DIY Circulars and Double Points
I love the look of beautiful, wooden circular needles, polished to a shine. Since most of my knitting is circular and most of my wooden needles are straight, I thought I’d try making my own. It wasn’t hard at all. Even if you whittle them by hand, you can easily make one pair in an evening.

What you need:
dowels in the correct diameter
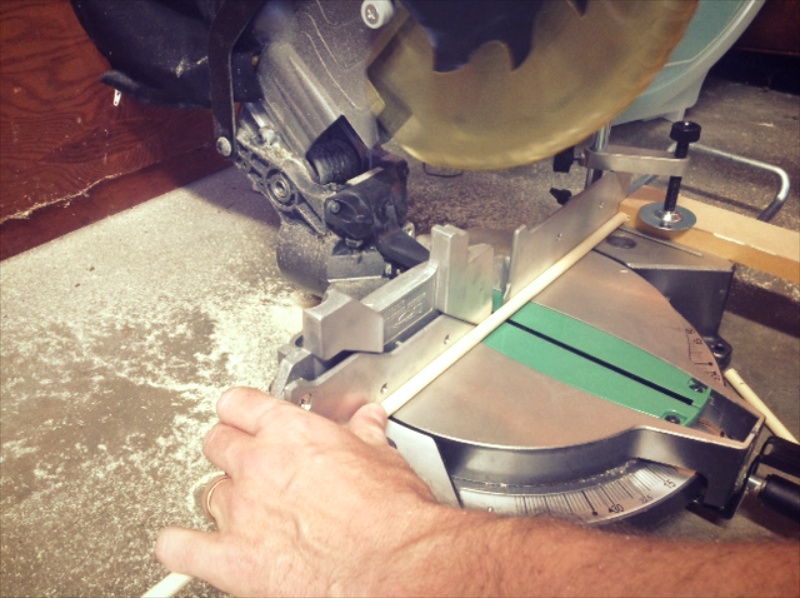
a saw (I used a miter saw, but any rusty old hand saw will probably work fine.)
a sharp knife to shape the needles (or pencil sharpener or radial sander)
Sand paper in a few different grits
tape measure
beeswax or paste wax
Additional supplies for circulars:
round weed eater line for any size needle tip (works best but usually comes in garish colors) or large flexible plastic tubing for larger needle sizes (I couldn’t find a type that was flexible enough for me)
strong glue (I used Gorilla Glue)
scissors
table clamp
a drill
a drill bit the size of your tubing or weed eater line
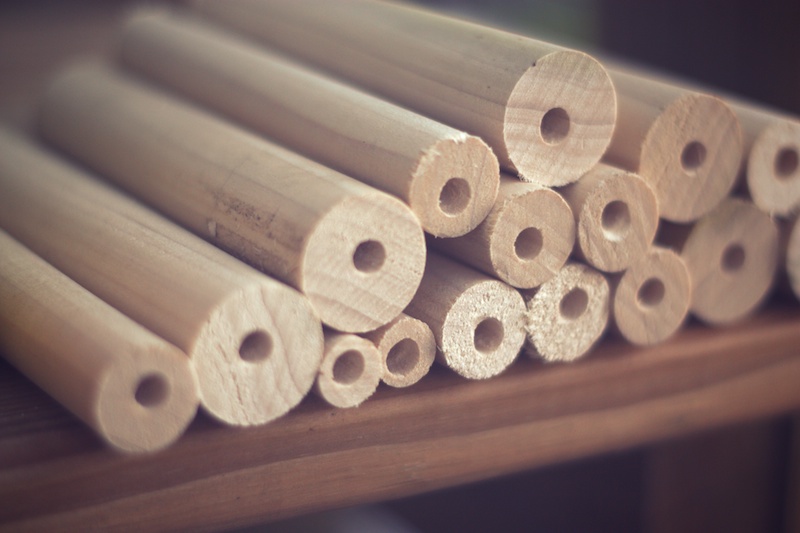
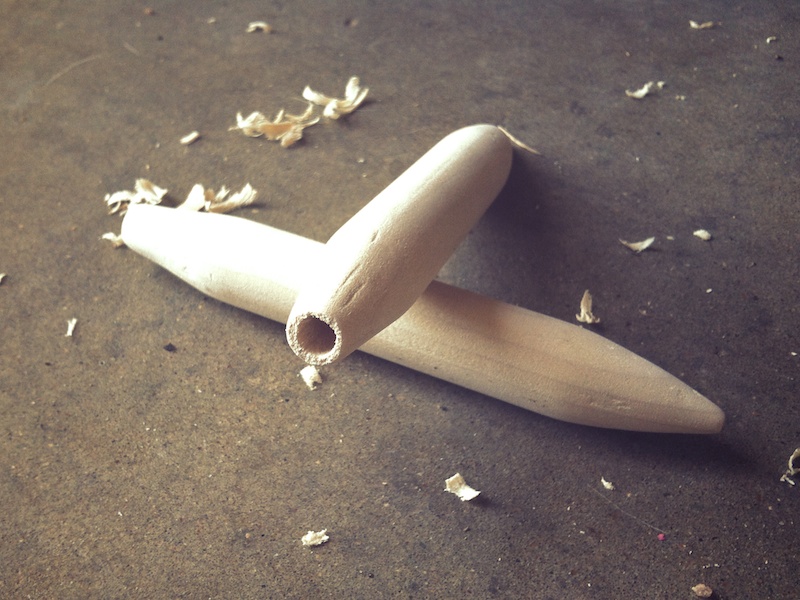
I then clamped each needle tip to a work bench and drilled about 3/4″ into the center of one end. (A note: if you are using large tubing as your needle cord and will drill a larger hole, you may want to use a smaller drill bit first to make a “starter” hole, ensuring the larger bit goes in evenly.)
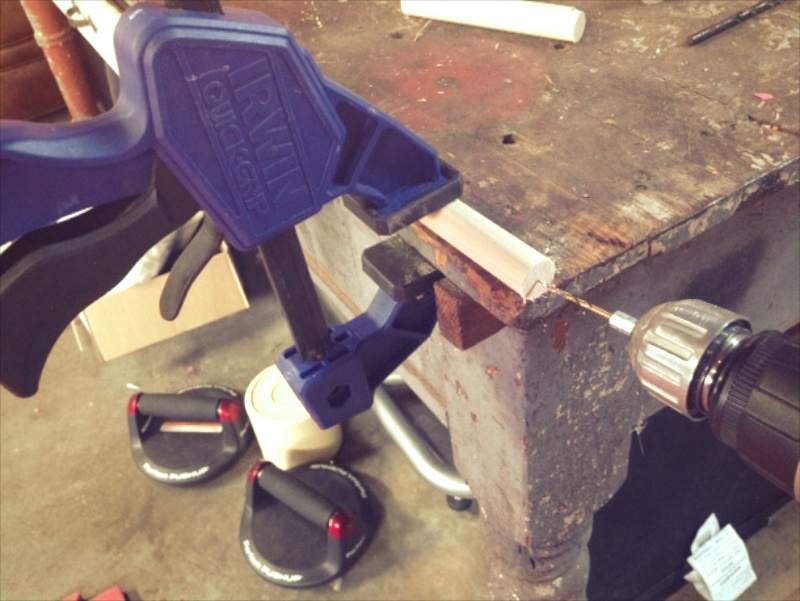

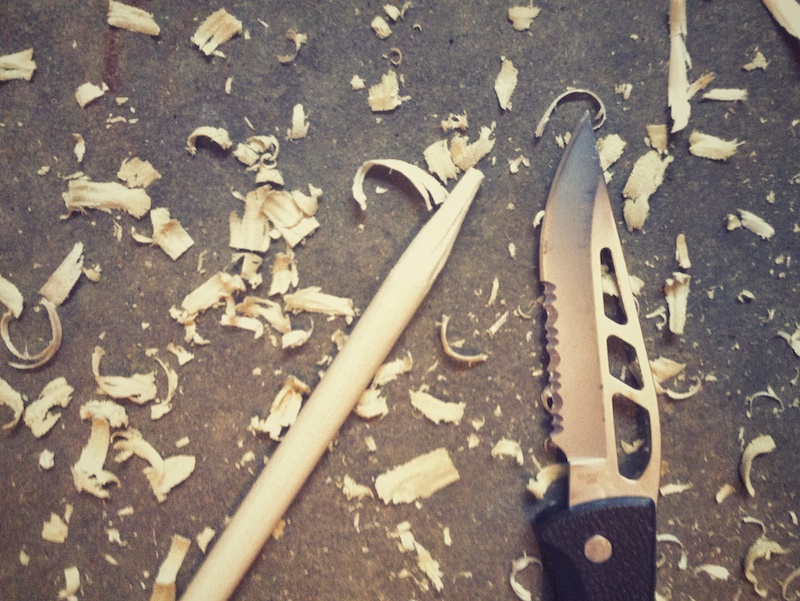
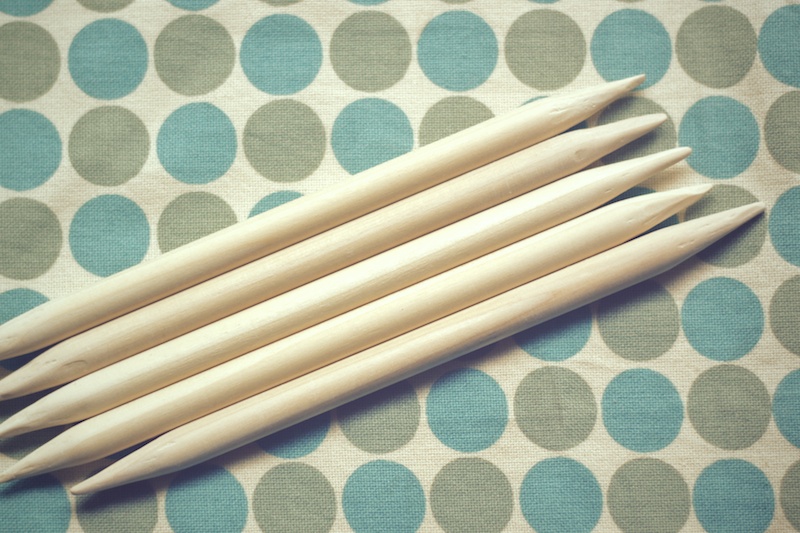
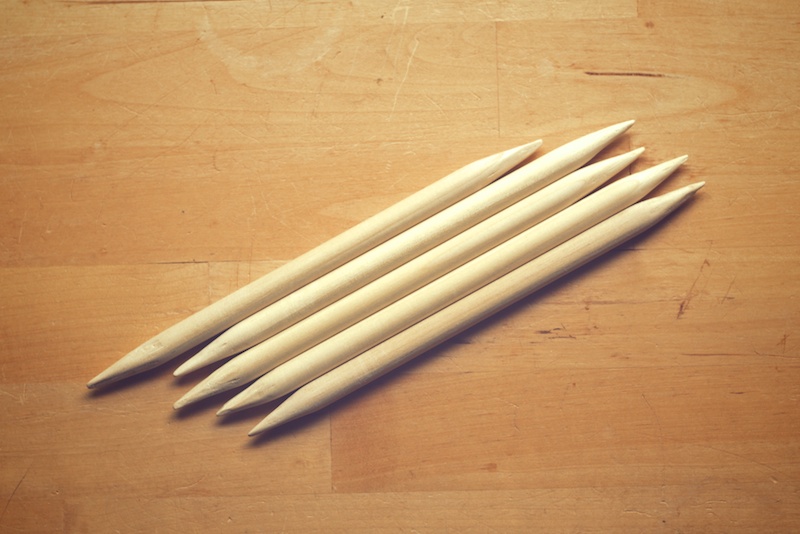
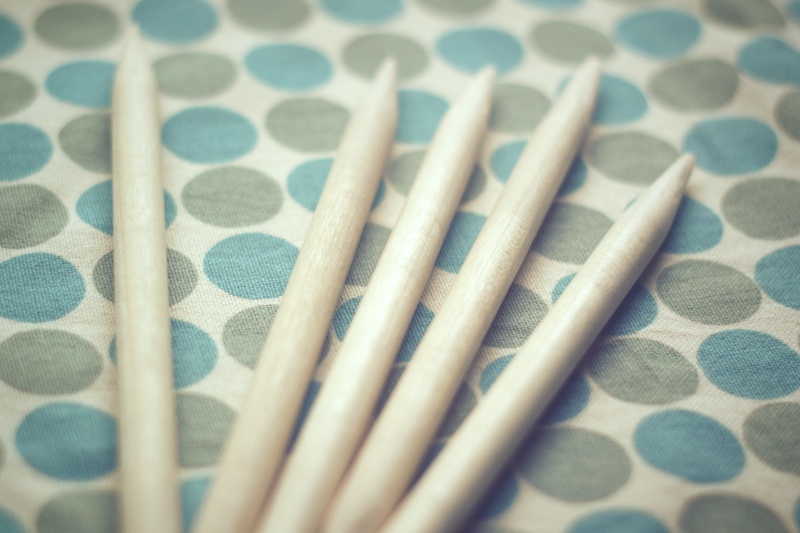
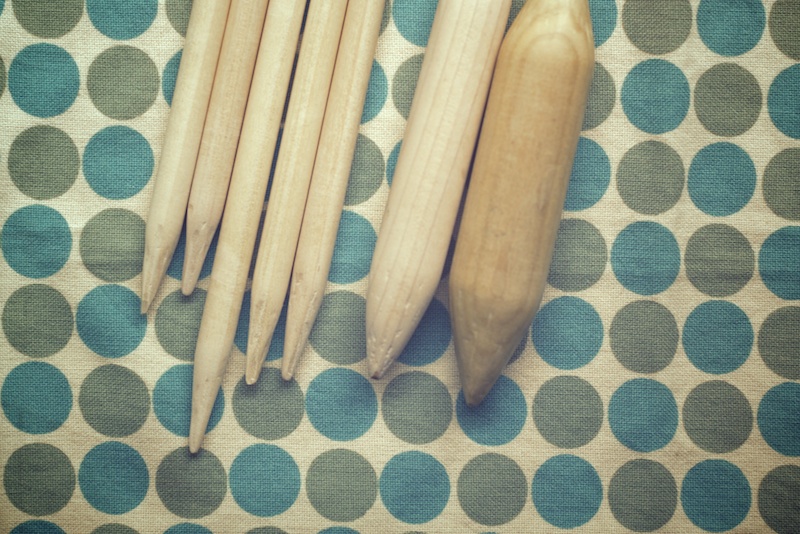
Now if you own a heavy duty pencil sharpener (for little sizes), a radial sander, or even a blade grinder, honing down your ends would be easier. We are missing a part to our radial sander and I wanted to feel earthy with a knife anyway, so I carved my first few needles. You can see they are not perfectly shaped due to the serrated blade I was using, but I like them.
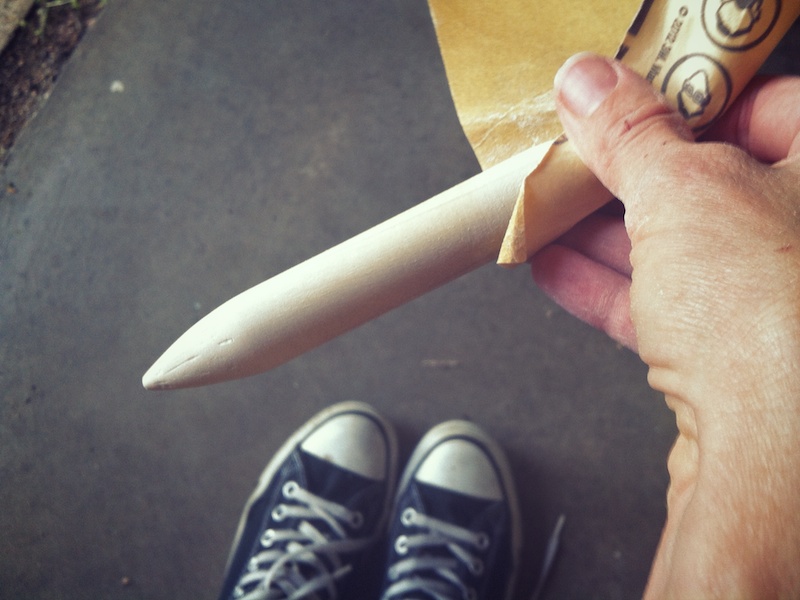
Now it was time to use my sandpaper, from the most coarse to the finest on the needles.
I followed with a couple of coats of paste wax (beeswax would work just as well) for some shine.

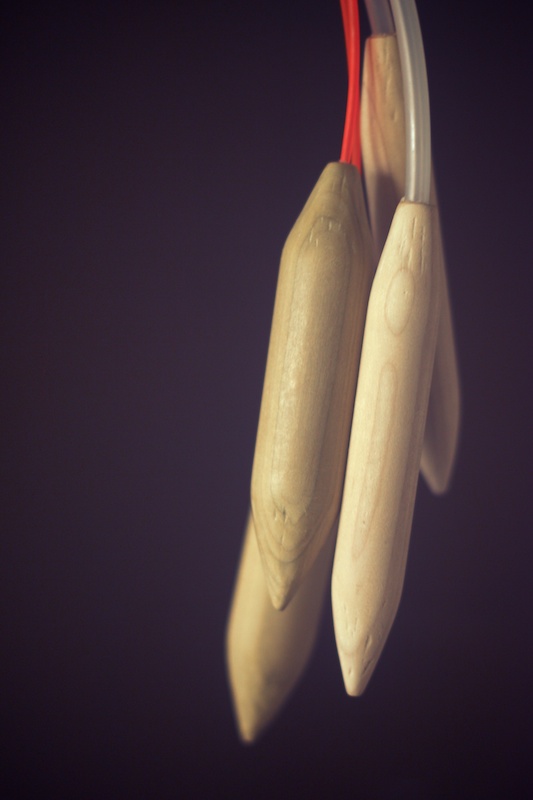
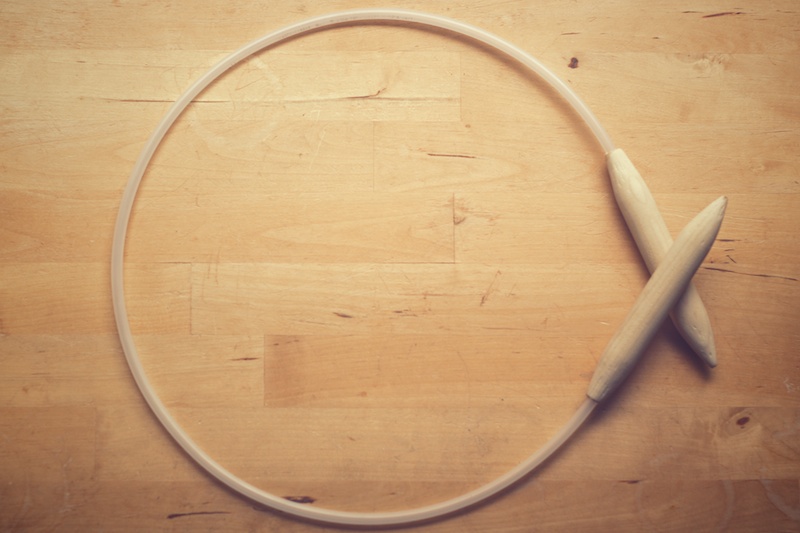
At this point the double points were finished. If you don’t want circulars, stop reading here and go use those double points to make a hat.
If you do want circulars, however, you need to make another decision: what lengths should the cords be? This was an easy step for me. I always use 24″ circulars. But having a 16″ and 40″ would be nice too. I’m not sure what I would make with magic loop on size 50 needles, but I have tons of dowels now to find out.
When cutting my needle cords, I kept the length of my needle and the 3/4″ amount of cord that would be fitted inside each needle tip in mind.
In other words:
24″(total length) – 9 1/2″ (combined needle tip length) + 1 1/4″ (for the bits of cord that will be glued inside the tips) = amount of cord needed for my 24″ circular.
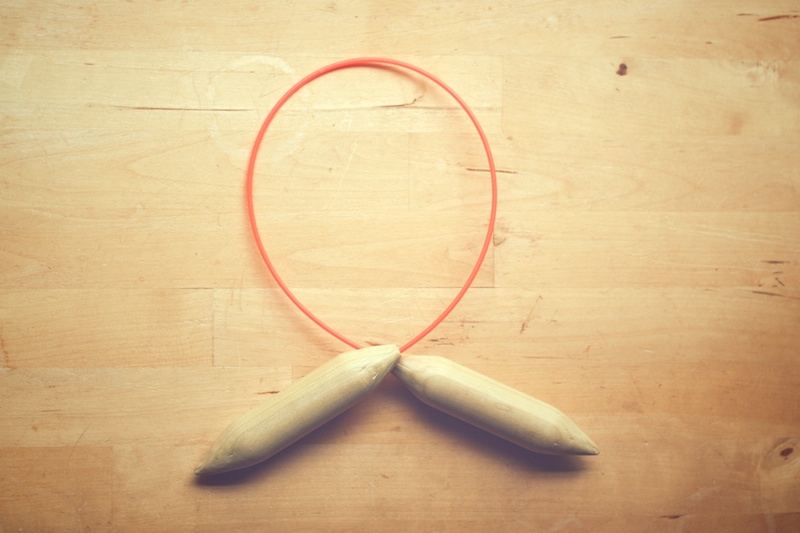
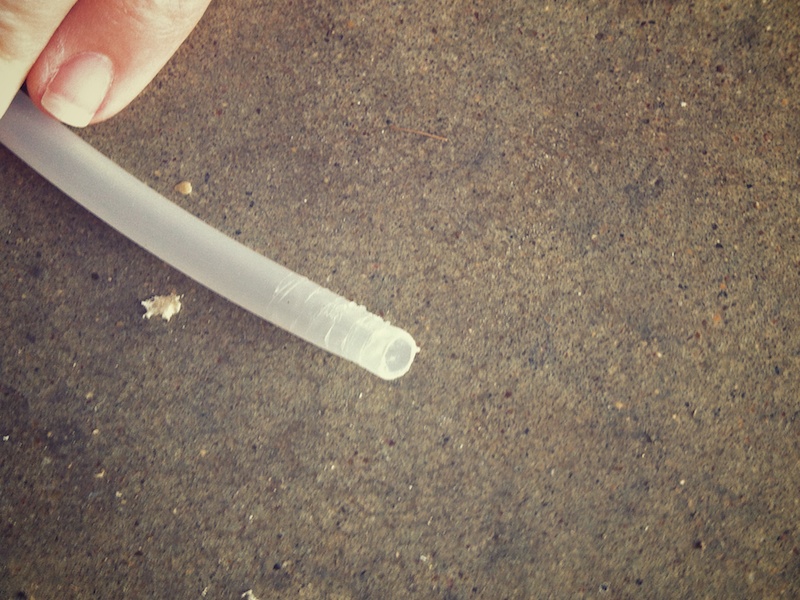
Or you can do like me and just stretch the needle tips and cord out next to a tape measure and guess. Snip them with scissors. If you are using plastic tubing be sure it is the very flexible kind. I didn’t really like this tubing on mine.
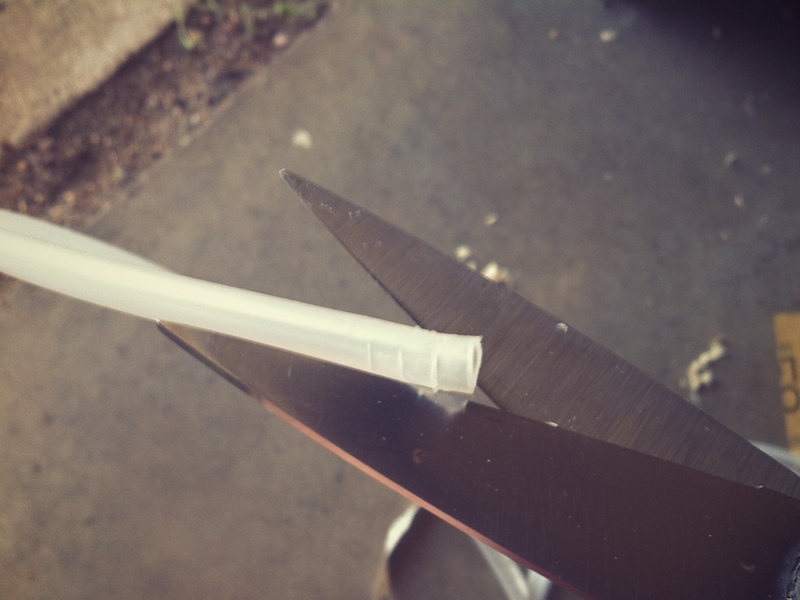
I, then, roughened 3/4″ of the end of the tubing by partially cutting into it with the scissors. I used them to nick it and make the cut bits flare outward slightly. The messier it was, the more surface for the glue to adhere to.
Next apply a bit of glue and shove it into the needle tip. Allow it to dry. You can always sand any bits of glue that are visible, but I found I could pick them off with my fingernails just as well.
You are now the proud owner of a one-of-a-kind, earthy, survivalist chic, handmade circular needle set. Now bring out the bulky yarn and knit that old Twinkle pattern you always wanted.
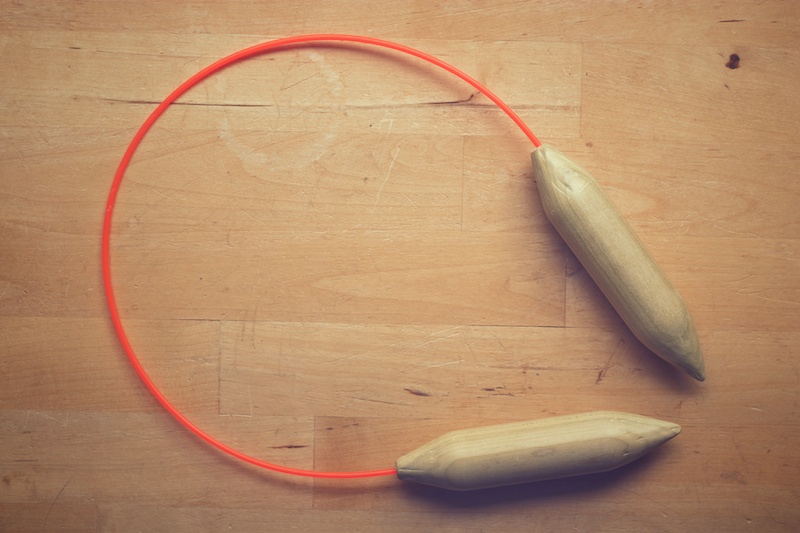
What I learned was that I prefer weed eater line to tubing, but most weed eater line is an ugly color, and pencil sharpeners can’t handle poplar. You can find other colors of line online.
So in two evenings, for the price of one and a half sets of wooden circulars, I have two sets of circular needles and one set of double points completely finished and ready to use, along with supplies for many more. I also have a big callous from whittling. I could easily cut one or two sets an evening when we usually sit outside and talk, but my son did say he’d bring the rest to shop class and hone them down as a Mother’s Day gift (Yay for wood shop!)
this is so amazing! the photos just make it. i may have to try this over the summer!
What a cool idea!
Wow! I'm really impressed. Nice needles!
WOW! this is very impressive!
Oh, thanks, Jennifer! I was worried the phone photos were kind of blurry. I'd love to see how yours turn out.
Thanks, Heather!
Thanks, Elena! It was really easy. I remember wanting to make the Twinkle Karate Sweater so bad and having to make do with small straight needles. Well, no more!
Thank you, Sarah!
awesome. i have turned my head at many a pattern because they call for really large circs and i am too cheap to buy them. now i know how to make them!
You're so crafty, Britt, yours would be beautiful! You know, knitting is such a time intensive craft that it's really nice to complete something in one evening once in a while.
Oh my gosh! You are so resourceful! You should start selling handmade needles. 🙂
Thank you, Vanessa, but not if they're hand carved! That was some work. I do think they'd make nice handmade gifts with some bulky yarn, though.
thanks for this tutorial! I would love to try this someday but I have a fear of power tools….
I hear you, Meg. I'm with the Amish when it comes to power tools and heavy equipment. But, the only real "power" tool you need is an electric drill. They're not scary. Any old hand saw would work for cutting the lengths of dowel. You should try it. BTW, I'm about to watch how challenge 3 came out on Fiber Factor. I'm rooting for your hand dyed accessories.