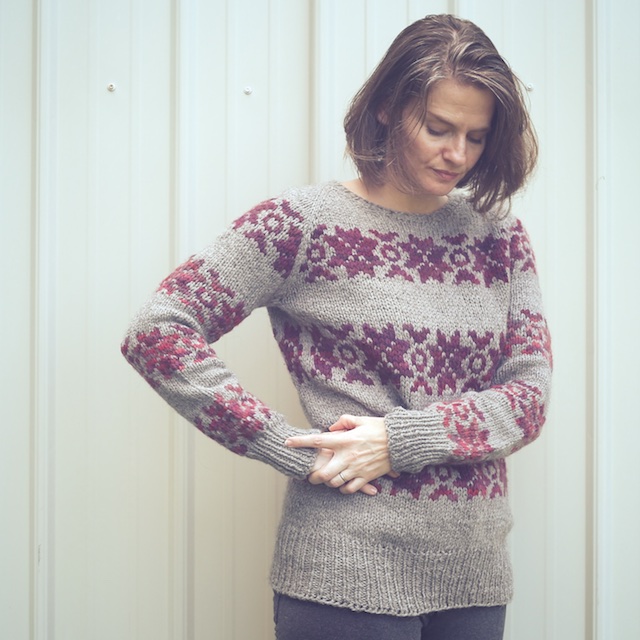
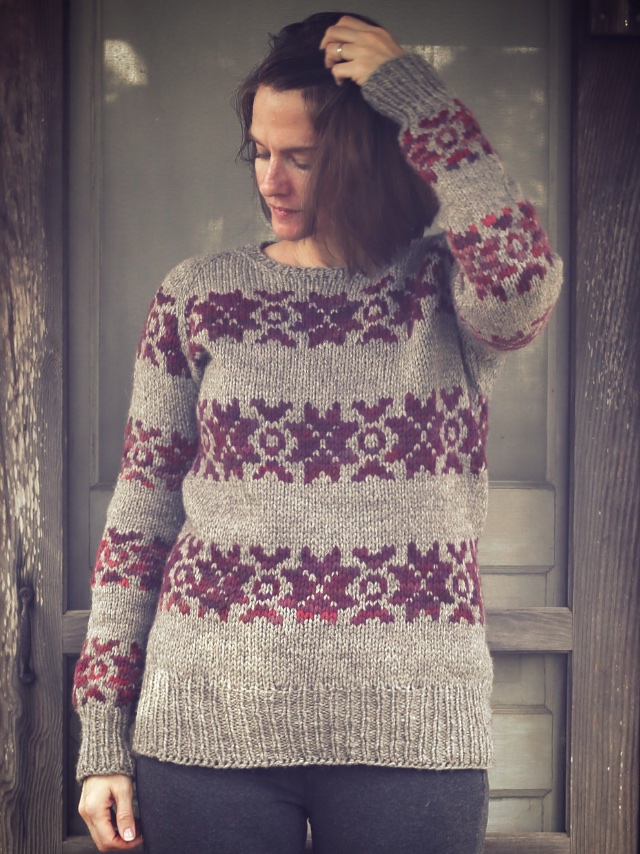
Lund or Linden? Sweater
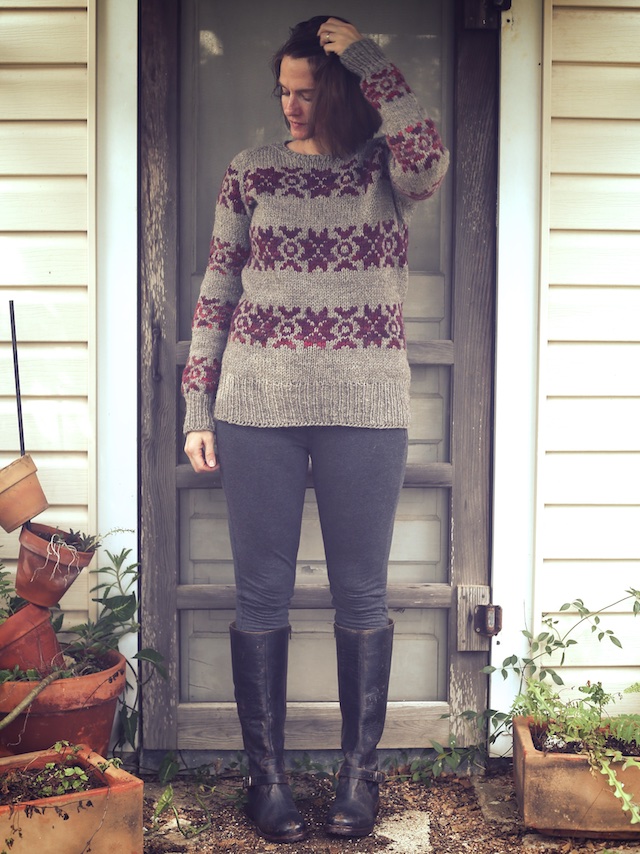
I already posted about the inspiration for this sweater hack, so this post will be a little more knitgeek and get into the details, all of which are nothing clever. So, if you wanted, you could make this sweater too and make it better. I wouldn’t have minded it being more oversized, to tell the truth.
I needed this big, easy knit in my life. I was mad at fingering weight yarn and the end of the Summer Sweater KAL was looming and I had nothing to show for it. Using older stash also let me include this in Little Bobbins‘ Purposeful Stash-along group.
This is the most modification I’ve ever done to an existing pattern. The only thing close to this was actually creating a sweater from Elizabeth Zimmerman’s percentage method. I had this color work chart from Alison Moreton and the Bulky Ease pattern from Alicia Plummer to somehow marry into a big, comfy sweater that didn’t hurt my overtaxed brain.
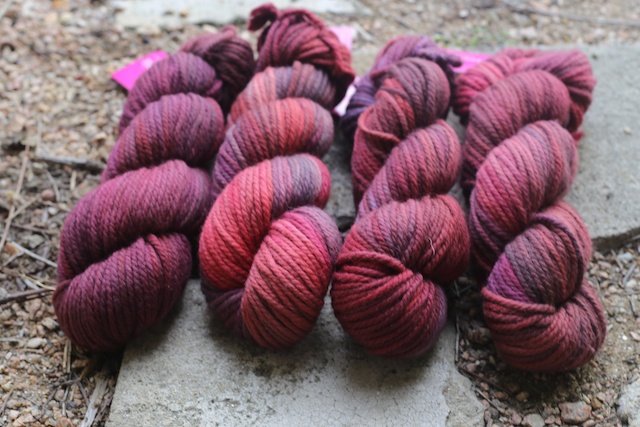
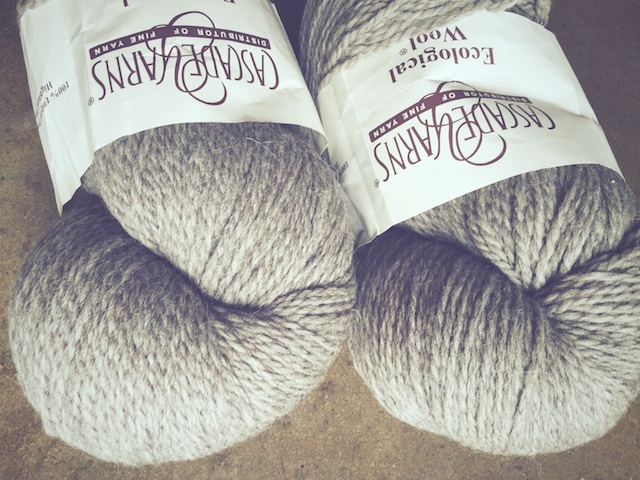
Tools: I used size US 6 for ribbing and size US 8 needles for the body. The yarn was 2 mega skeins of Cascade Eco and 2 skeins of Sweet Georgia Bulky in the Terra Firma colorway as my contrast color. I love the dimension the semi-solid color of the Sweet Georgia added to the Fair Isle. I find that using an extra fancy yarn for only one of the stripes in a sweater can make a big difference in the impact, while only raising the cost a little. Same applies to Fair Isle “stripes.” The Sweet Georgia was also discontinued and on a big time sale at Craftsy, so I couldn’t pass it up. And is there anything more fun than I gigantic ball of Cascade Eco at the other end of your knitting?
Basics– To get the pattern centered on front and back and not have to worry about making side increases and decreases work, I decided to let my raglan increase stitches be in the main color and to keep a side “seam” of 2 stitches in the main color all the way down the sweater and inside of the sleeves. Personally I like the look of raglan stitches in MC. The side seams were just for convenience- remember, brain hurtage?
I also reduced the waist shaping to 3 increases and 3 decreases.
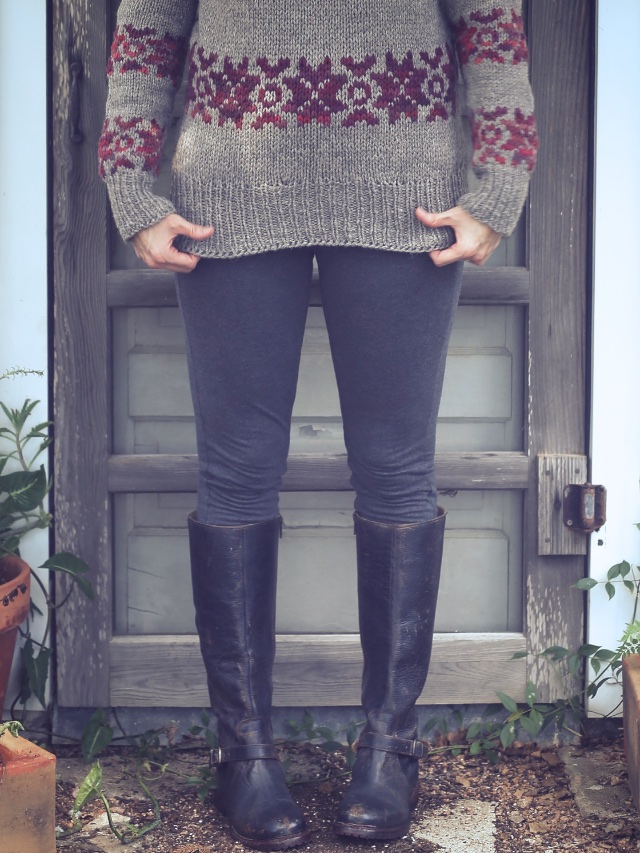
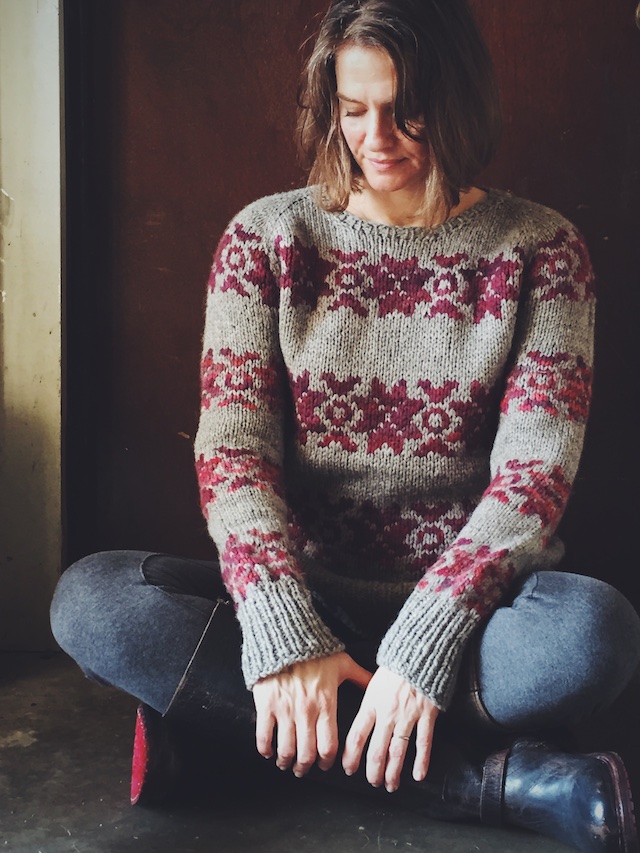
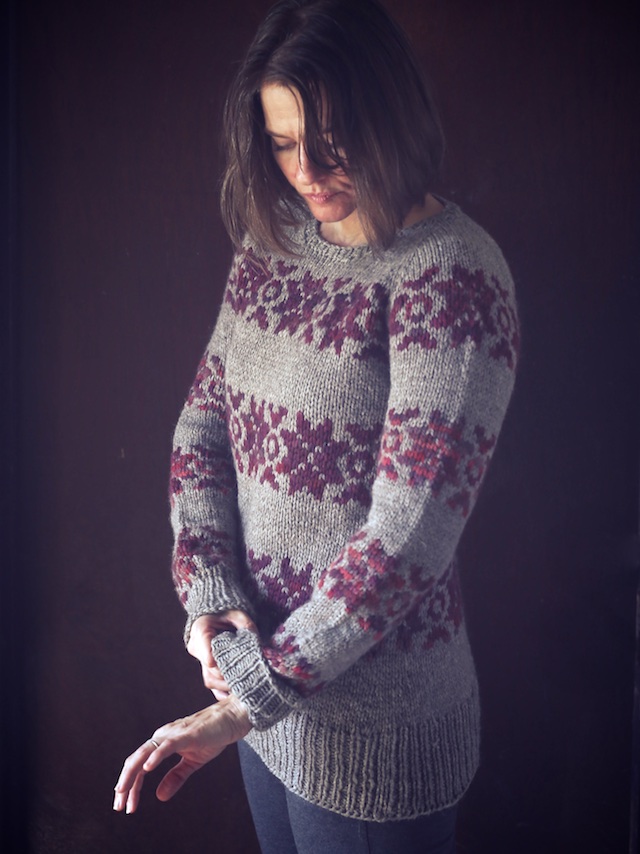
There are 3 color work stripes on the body and 4 on each sleeve.
Except for the raglan increases, I kept all of my shaping rounds in the solid colored stripes.
With this post, I am reminding myself of my mods, without giving pattern details away. If you’re interested read away. If you’re not, scroll on, brother.
Modified cast on– I added 3 stitches to the cast on, increasing a stitch for each sleeve and one for the back. When joining after working short rows, I cast on 11 sts for the front neckline.
Charting the first colorwork stripe–
My color work stripes were 12 rounds deep and my solid stripes were 13.
Since my color work pattern is interrupted by the raglan seams, I just drew out my color chart on graph paper and counted back from what the center stitch of the front should be to decide where in the chart to start the colorwork for front, back, and sleeves. For my size, that was at stitch 15 in the color work pattern for the front and back, and stitch 4 for each shoulder.
Once I did my first round, it was easy to follow from that point forward. I wrote out the beginning and ending stitch numbers for front/back and a sleeve ahead of time and made hash marks next to them as I knit them. That way I could quickly check myself as I began a new portion of the chart.
I worked 11 raglan increases, total. My color work began on the 3rd raglan inc round and after finishing that color work stripe, which included 6 increases, I still had 3 sets of raglan rounds (6 rounds total) to complete in the main color.
Sleeve separation– At this point my stitch counts for front, back and sleeves were all just 1 stitch more than that of the pattern.
I slipped sleeve sts, as directed, casting on 4 stitches for the underarm. I continued knitting in the main color until I was on the last round of that MC stripe (round 13) in which I made my first waist decreases.
Second Colorwork stripe– With the addition of underarm stitches and the fact that I would be maintaining 2 MC stitches at either side of my side markers (see photo below), my first round of this colorwork stripe went like this: 1 MC st, st. 10 of chart, work chart across front and end on st. 12, then a MC st., slip marker and repeat for the back. I maintained the MC faux side seams all the way down the side of the sweater.

At this point I’ve probably lost anyone who might have considered doing this. I understand, but I’ll keep typing for my own benefit.
Last waist shaping rounds in third solid stripe– So on the next MC round, I decreased in pattern and decreased again on the last (or 13th) MC round. That is all of the decreasing I did.
Third colorwork stripe- I started on a different st of the color work chart because of the decreasing, it was st. 12 I believe.
Hip increases and fourth solid stripe– In the 13 rounds of this stripe, I increased steeply on rounds 1,7, and 13.
Decrease for Ribbing– I decreased 8 stitches evenly, switched to size 6 needles and worked ribbing for about 20 rounds.
Sleeves– Using size 8s, I cast on 6 stitches for under arm and finished the solid colored stripe, ending with a decrease round.
I started my colorwork round with a MC “seam” st, then st. 5 from the chart.
Sleeve Decreases– the first one was just before the first sleeve color work stripe (last round of a solid stripe) and the next 4 happen on the first and last round of the solid stripes.
There will be 4 color work stripes on your sleeve now. After the 4th one, I decreased 6 sts evenly, then began the sleeve ribbing.
Bind offs– I liked the sewn bind off I used on the sleeves. I don’t know if I like my Jeny’s stretchy Bind off on the body because I do rib so loosely. But it’s an oversized sweater and I wanted it to be loose, so I think I’ll leave it.
By the way, I blocked, then pressed this to get the puffy color work stripes to not me too Michelin Man. I also wove in my ends by running the loose ends through the center of several color work strands on the back of the work, as Tanis recommended in the SSKAL post. This really cut down on the added bulk.
I wish I had better photos of the sides and of the sweater in general. It was in the nineties when my son helped me take these, then my camera battery ran out and my phone was too full of videos I can’t erase to take another photo. Of course. But I don’t think a photo of this colorwork motif could be ruined if I tried, it’s too classic. I love that I’ve got a stash busting, bulky, vintage, tv-inspired, comfy knit all in one.
Now, I debated with myself about adding the Ease drawstring collar and doing the motif around it, but decided that was just too much warmth for me. In worsted, though, that would be cool.
(on ravelry, kollabora, instagram, and flickr)
The next knit I do from Alicia better be Cooldown. I obviously, can’t get enough of the raglan baseball look. If SSKAL is extended, I might even finish the sleeves for my Pomme de Pin. Maybe.
Whew!
Longest post ever! Check out the other finished knits for this KAL in the Ravelry thread.