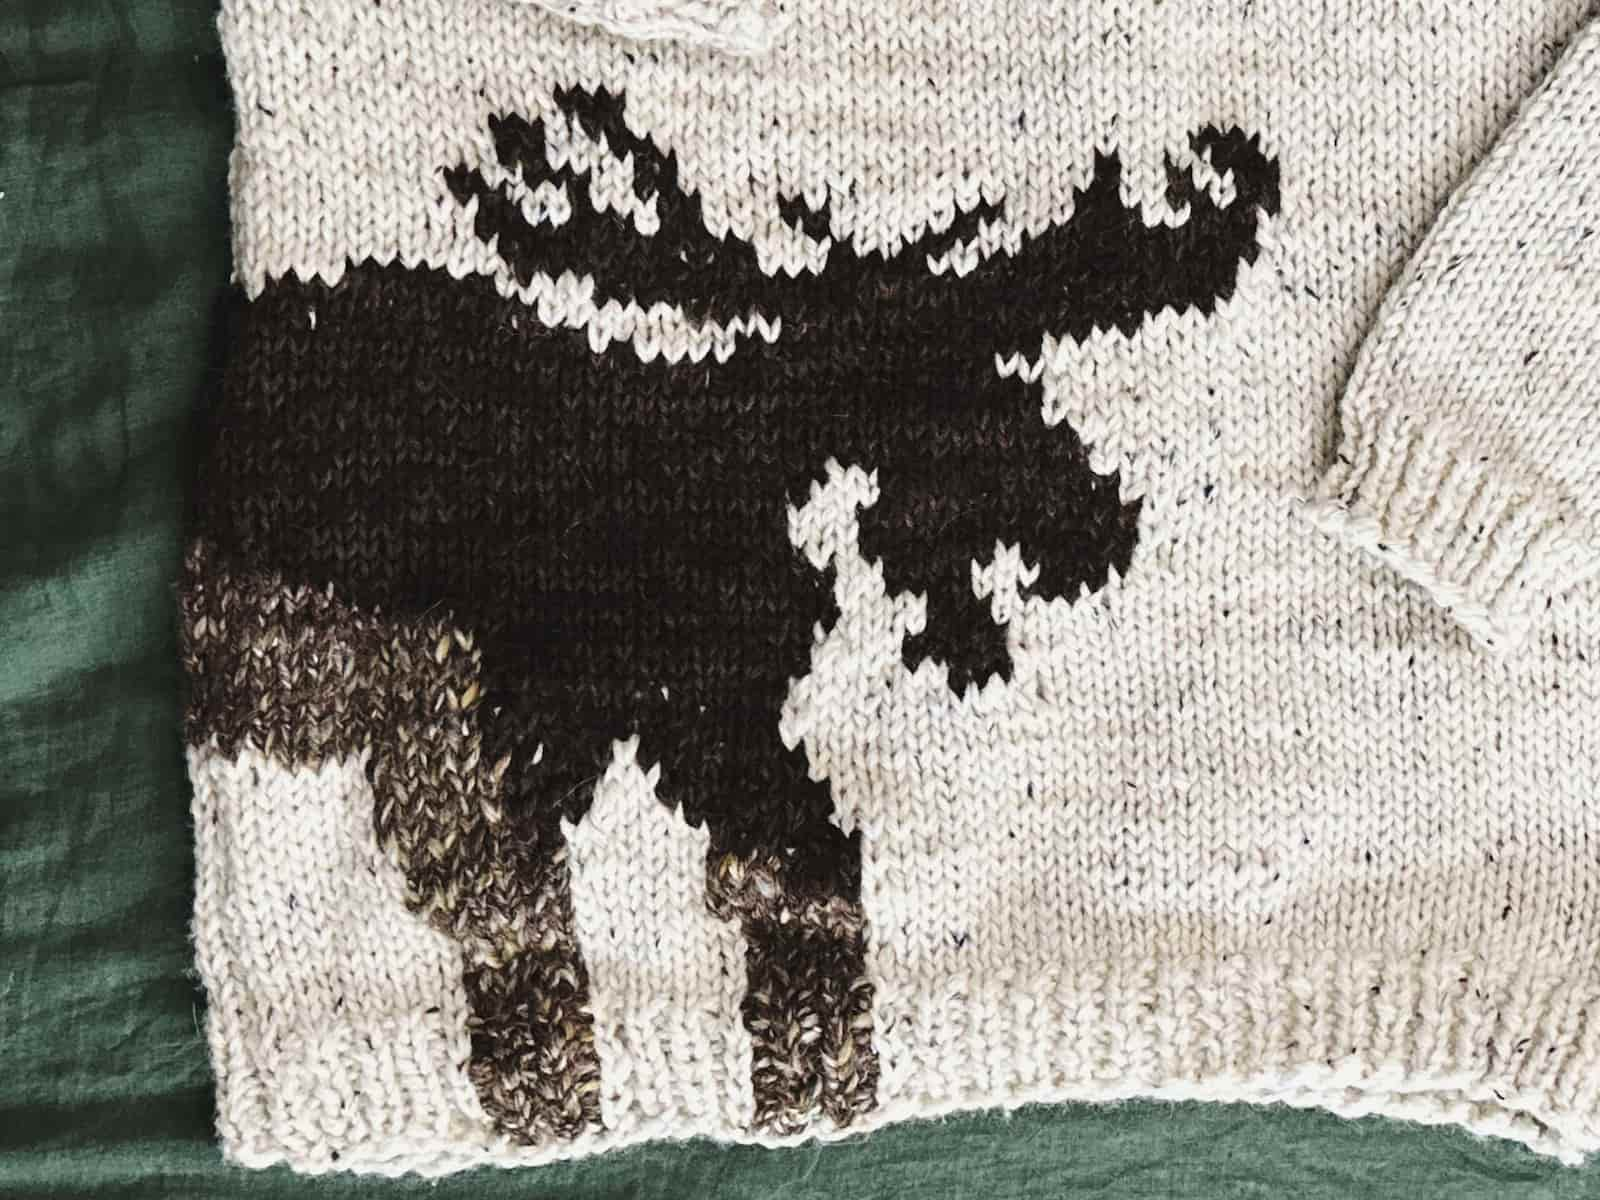
How To Make Your Ugly Moose Sweater, Step-By-Step. Sort of.
You know how I’ve been focused on recreating some famous knits from tv, movies, etc the last few months? Well, Christmas was the perfect excuse to make the How I Met Your Mother moose sweater as an ugly Christmas sweater. My only question was how ugly should it be?
This post has more details on my sweater, some of the nuts and bolts, the basic recipe that goes with my video about it, and some ideas on how to “pretty it up” should you want to.
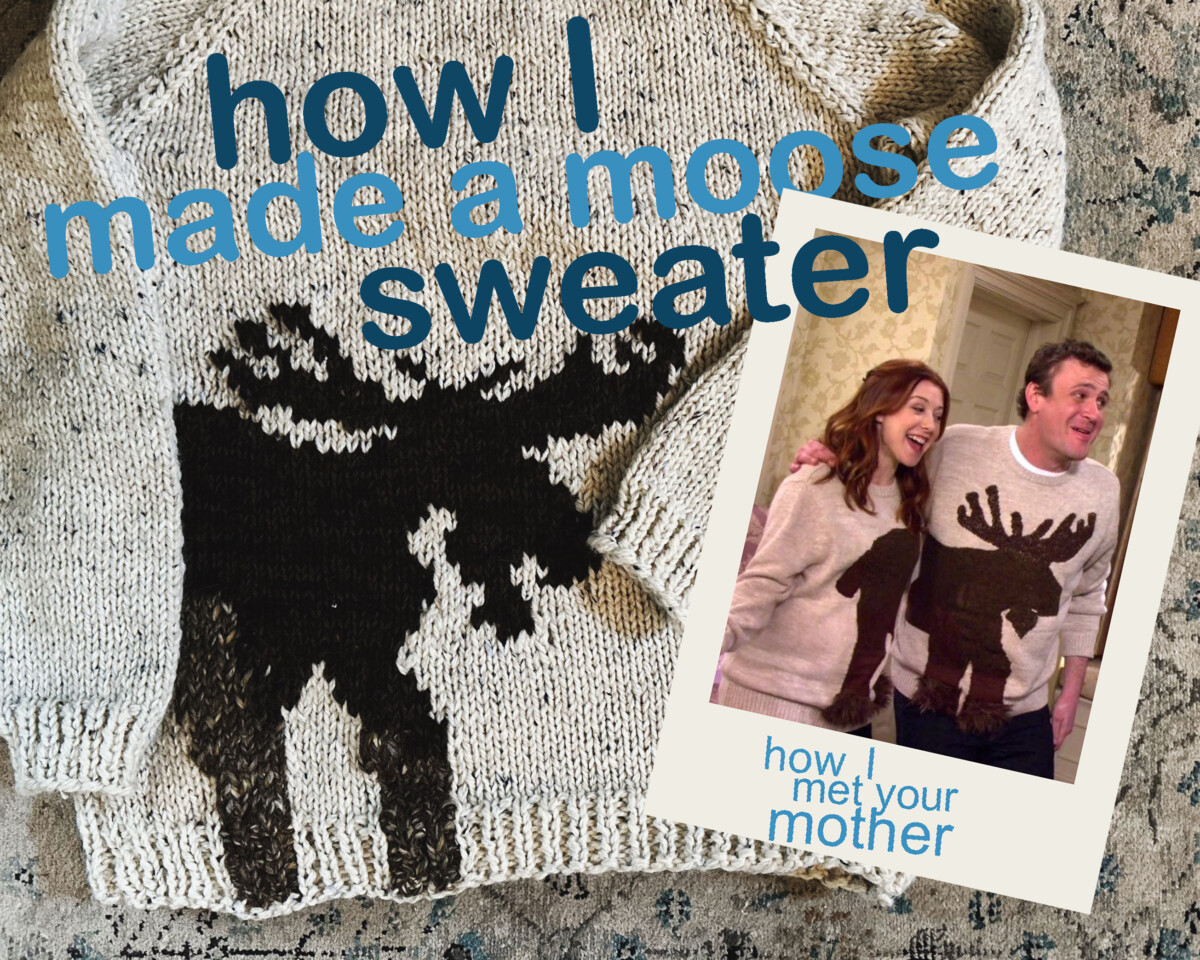
Why So Ugly?
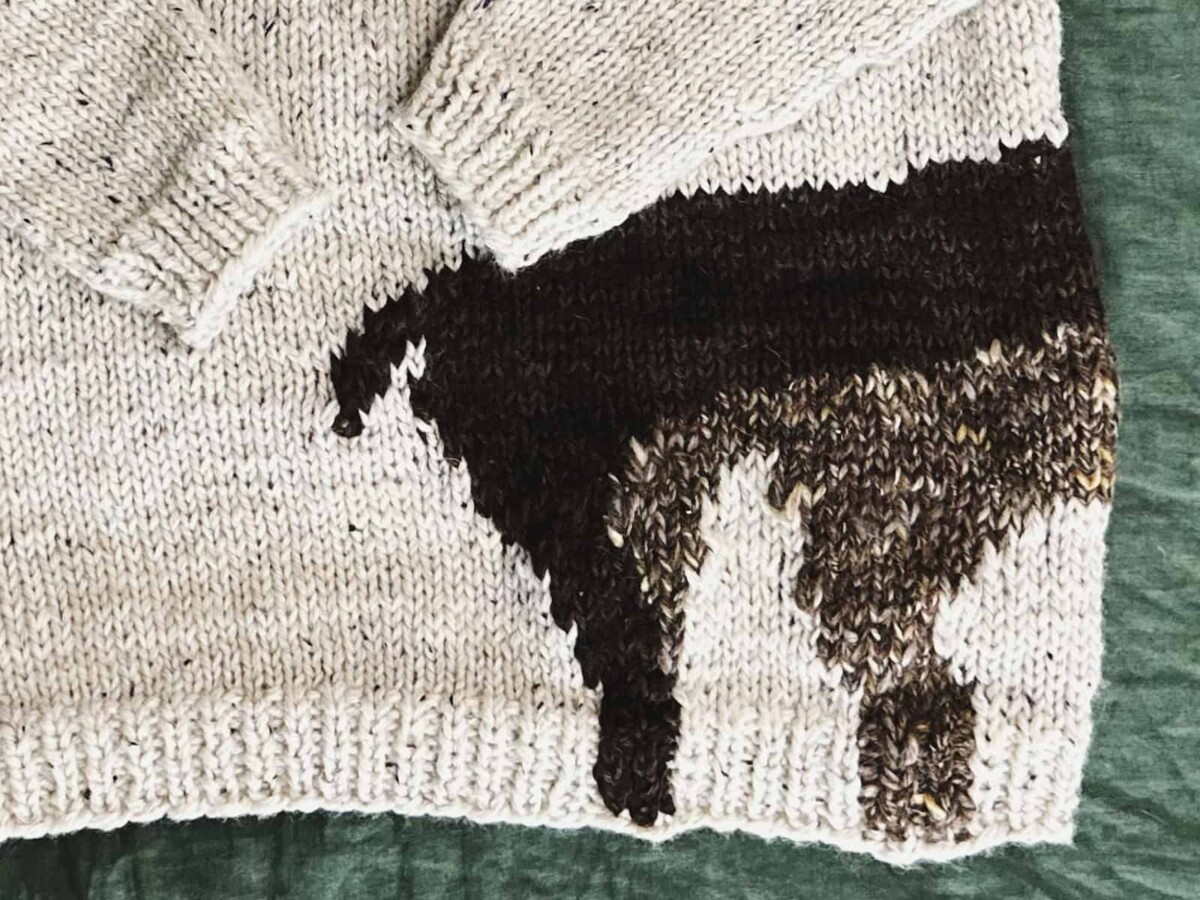
There’s a story behind the knitted sweater gift gone awry told by a costume director for the tv series, which makes it even more fun. As perfectly ugly as it was, I didn’t want to completely replicate it because 1) I didn’t have brown faux fur and 2) I didn’t want to applique fabric to my sweater. Hm, this would cut down on some of the ugly.
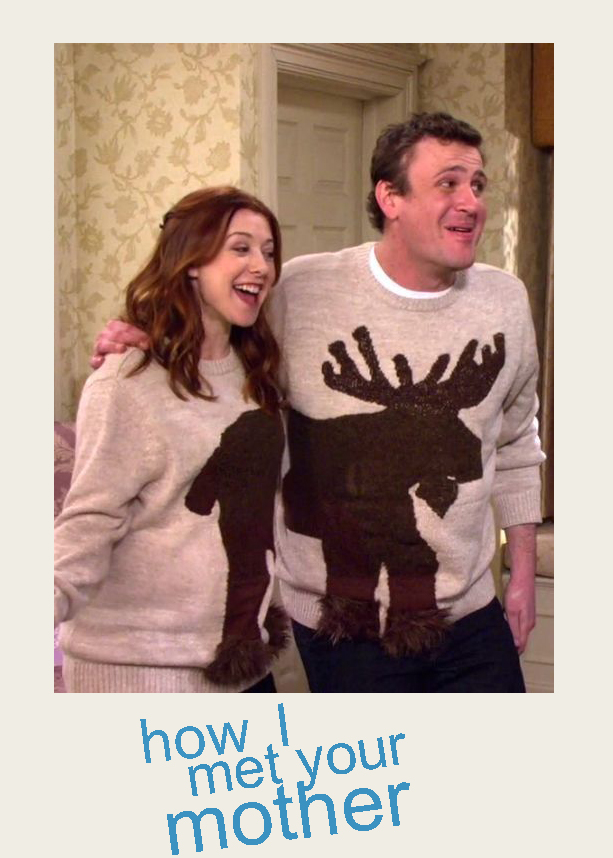
When I found extra bulky and tweedy Berroco Campus yarn in my stash I decided it could stand in for the mismatched and furry parts of the moose. The fact that it is supposed to be recessed areas but is lighter and puffier than the rest of the moose looks odd and more than makes up for the fact that my sweater won’t be a mixed-media experiment.
Why Am I Posting This Sweater Recipe?
This is a fun little Christmas gift to readers and viewers. While I doubt anyone will want to recreate this, I do think a cursory read-through might be inspiring. I love seeing how other knitters recreate projects and solve problems. I even like watching fails. It makes me itch to create. So feel free to skim and scroll to get all the DIY feels without making your own moose. Merry Christmas!!
This post is my stitch counts and very basic pattern math you can use or tweak for your own sweater. Episode 87 of My So-Called Handmade Life is the companion video to this post and covers more of my thought process. (I am laughing inwardly as I type that.) and it’s a chatty companion for knitting and seaming.
Don’t want to make a bulky sweater? Just slip these charts into any existing sweater pattern, or wing it with worsted and see what happens. Your moose may be smaller, but that could be a mercy.
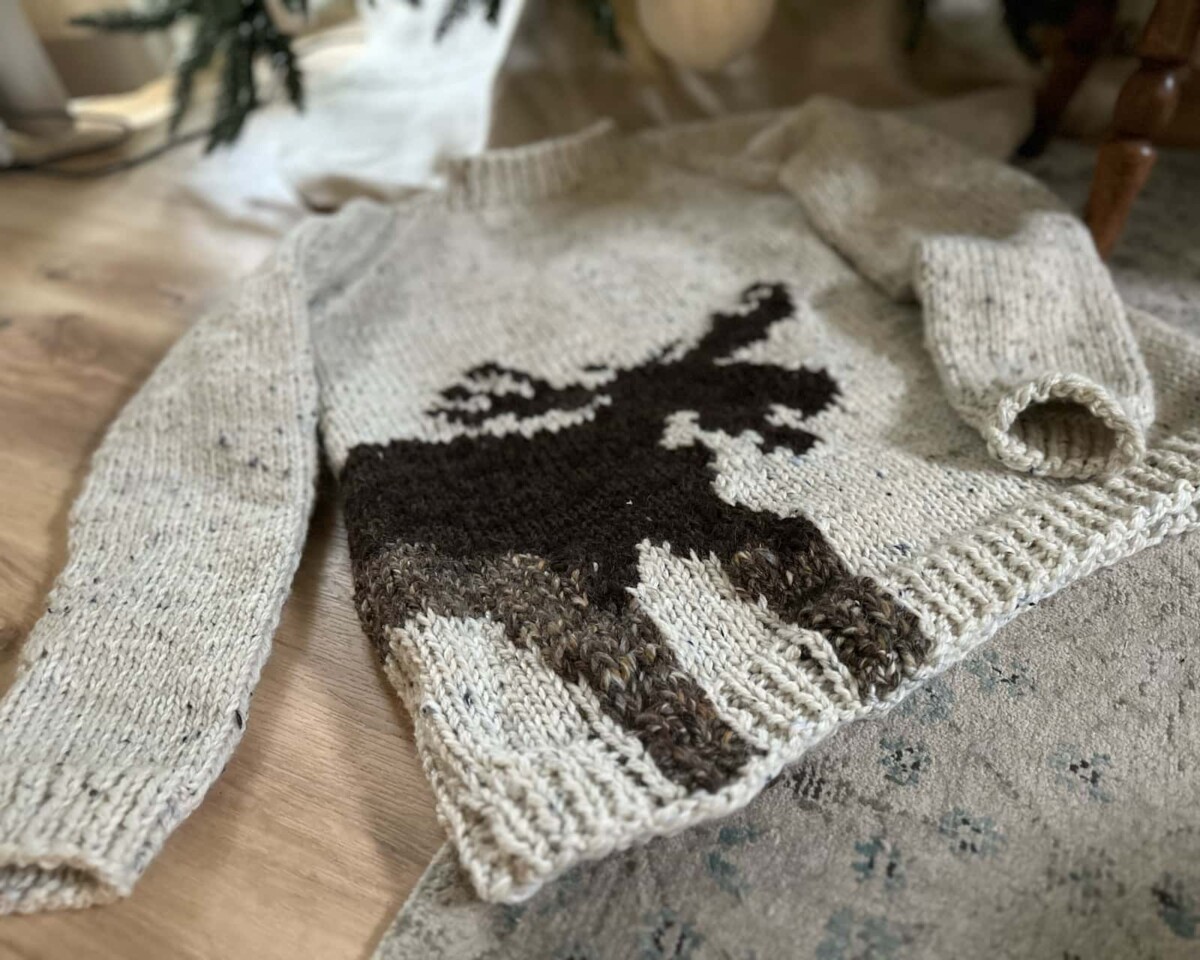
Materials for the Perfect Moose:
You’ll need a bulky wool in three colors. You’ll need a main color and two different moose-y browns. I copied the original moose sweater by using the lighter brown as Contrast Color 1. You might even be able to use a super-bulky, depending on your gauge.
1. Get a Bulky Yarn or Consider Stashbusting!
There’s virtually no reason not to stash bust when you’re goal is an ugly sweater. Anything works. My choices were a mix of bulky and worsted stash held together. (I’m all about using stash lately, remember?)
- Cascade Ecological Wool (bulky) in a cream color held with…
- Patons Classic Tweed (worsted), in Aran for Main Color
- Berroco Campus (bulky) in Leatherbound, held with…
- Wool of the Andes Tweed (worsted) in Reindeer Heather for Contrast Color 1 (Feel free to use faux fur yarn for this.)
- Cascade Ecological (bulky) in brown, held with…
- Wool of the Andes (worsted) in Grizzly Bear for Contrast Color 2
2. Grab Two Needle Sizes:
You’ll need one size for working the body and another that is two sizes smaller for working all ribbed edges. (I used US sizes 7 and 9, but I knit loosely.) I work sleeves in magic loop so I used the same long circular for everything and just changed my needle tips.
3. Get Your Hands on a Copy of Knitting Without Tears by E.Z.
I am not being an overly enthusiastic blogger when I say this book is a must for anyone who wants to own their knitting. It demystifies techniques and helps you become less reliant on patterns. She is the OG how-to queen. This recommendation alone is an excellent gift to you. (You’re welcome.)
I used Elizabeth’s advice for much of this sweater but I always keep it handy any time I make modifications on existing patterns.
4. Use or Make Bobbins?
I have never used real bobbins on a knit. I have made weird and semi-useful cardboard bobbins for duplicate stitches, but never for intarsia. If you’re like me and just don’t feel you have enough mental bandwidth for a DIY within your current DIY project, just butterfly wind up your yarn or make little balls that hang behind your work on your lap.
Wind any combined yarns together before working intarsia. You do not want to be dealing with twice as many tangled bobbins behind your work as normal. So, if you are holding different yarn weights together to make this guy, pair your yarns together and wind them up before you start.
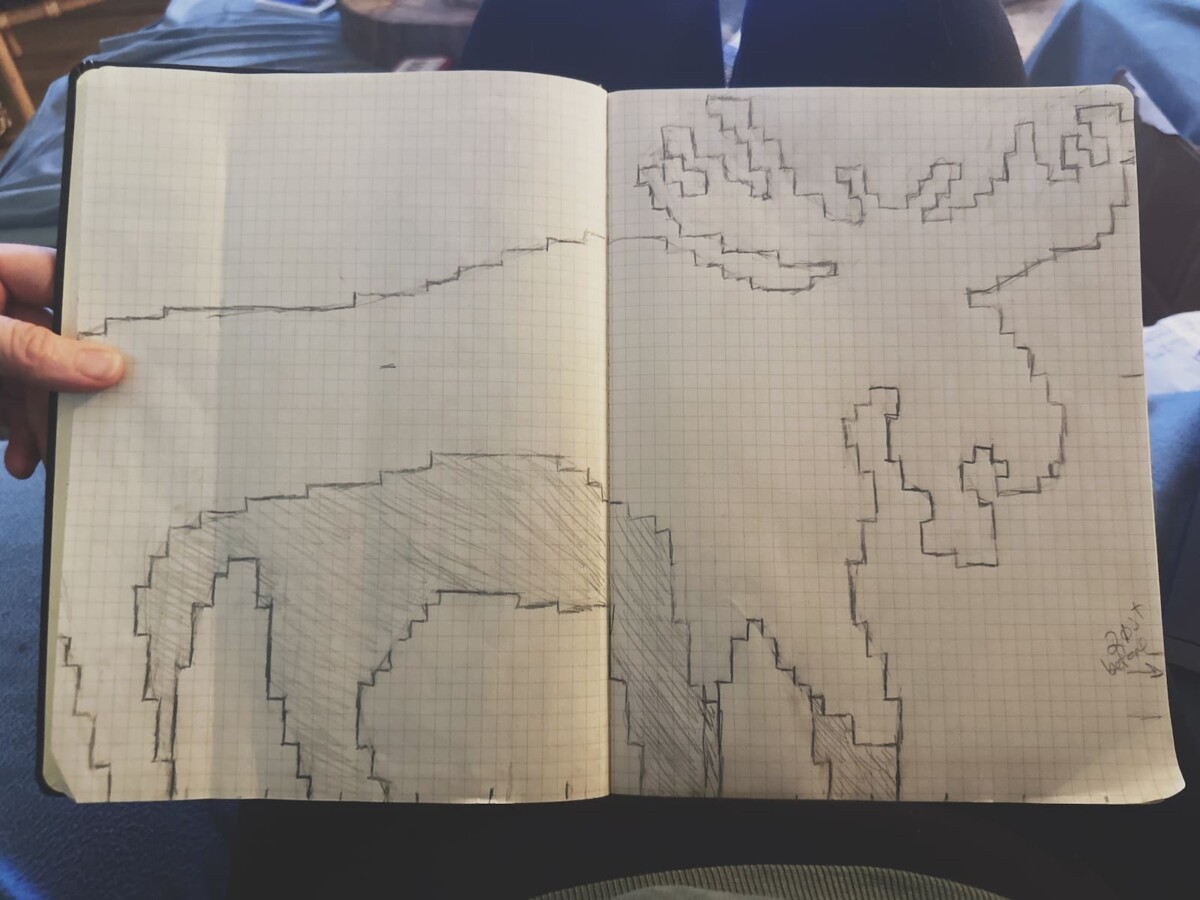
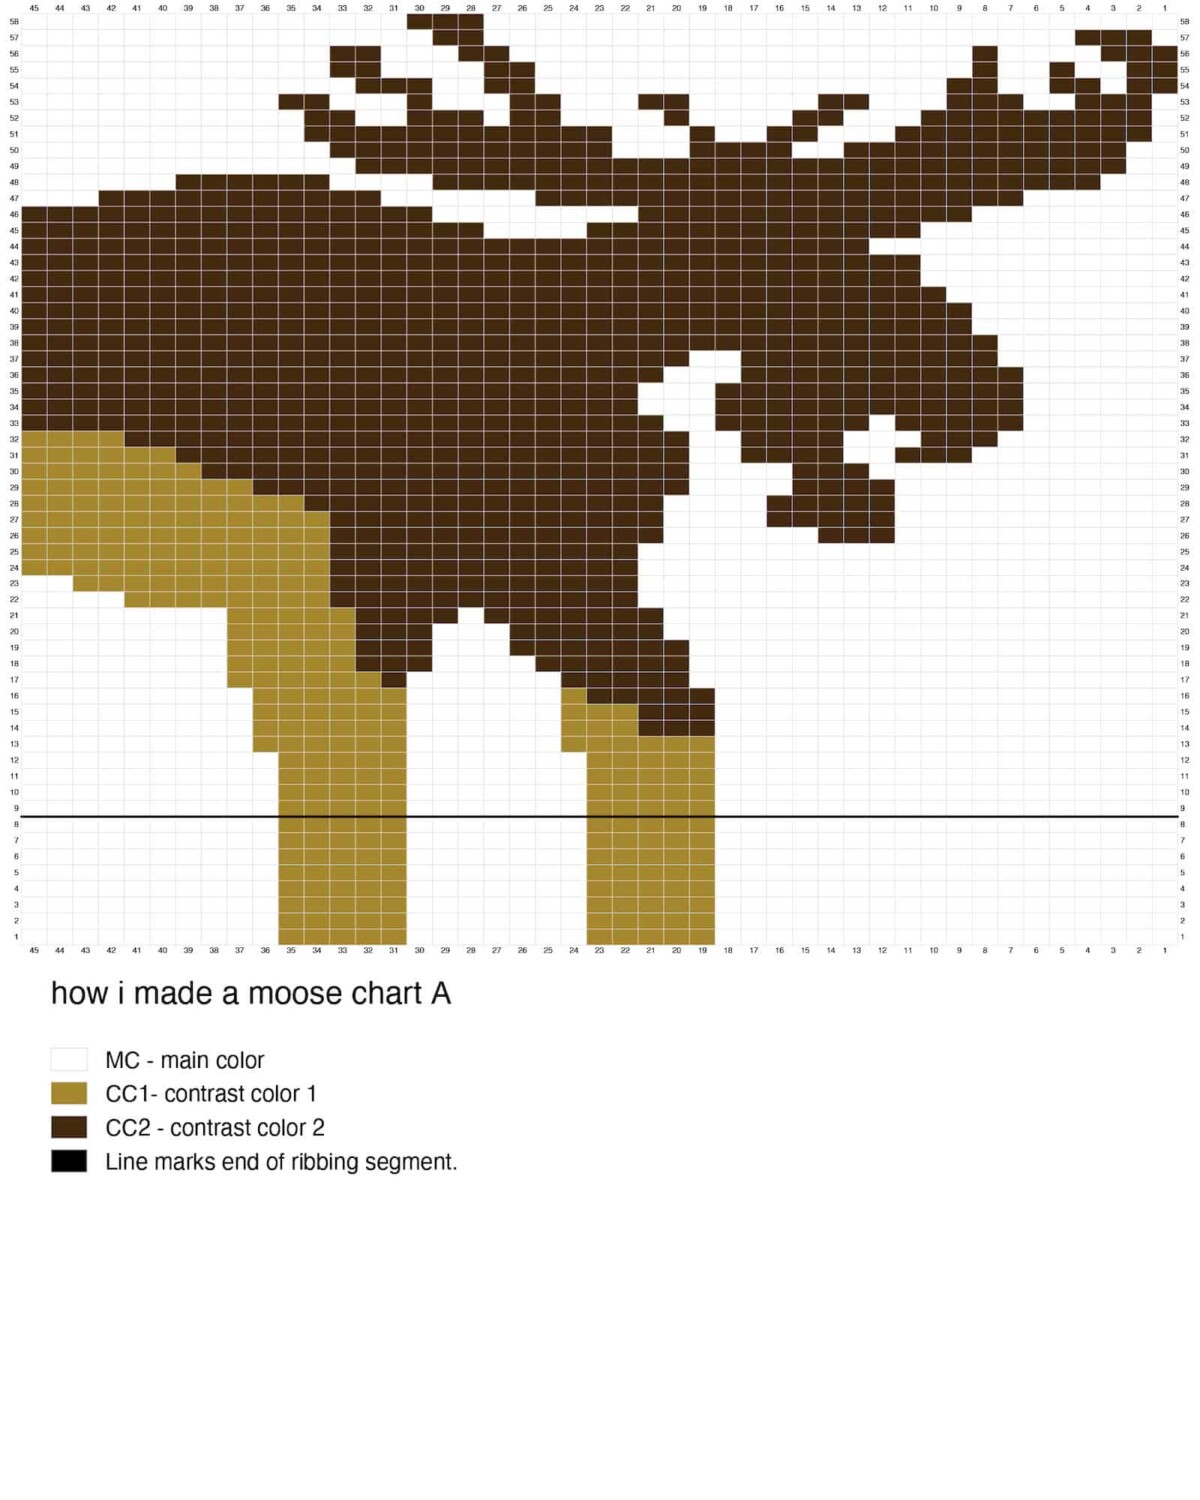
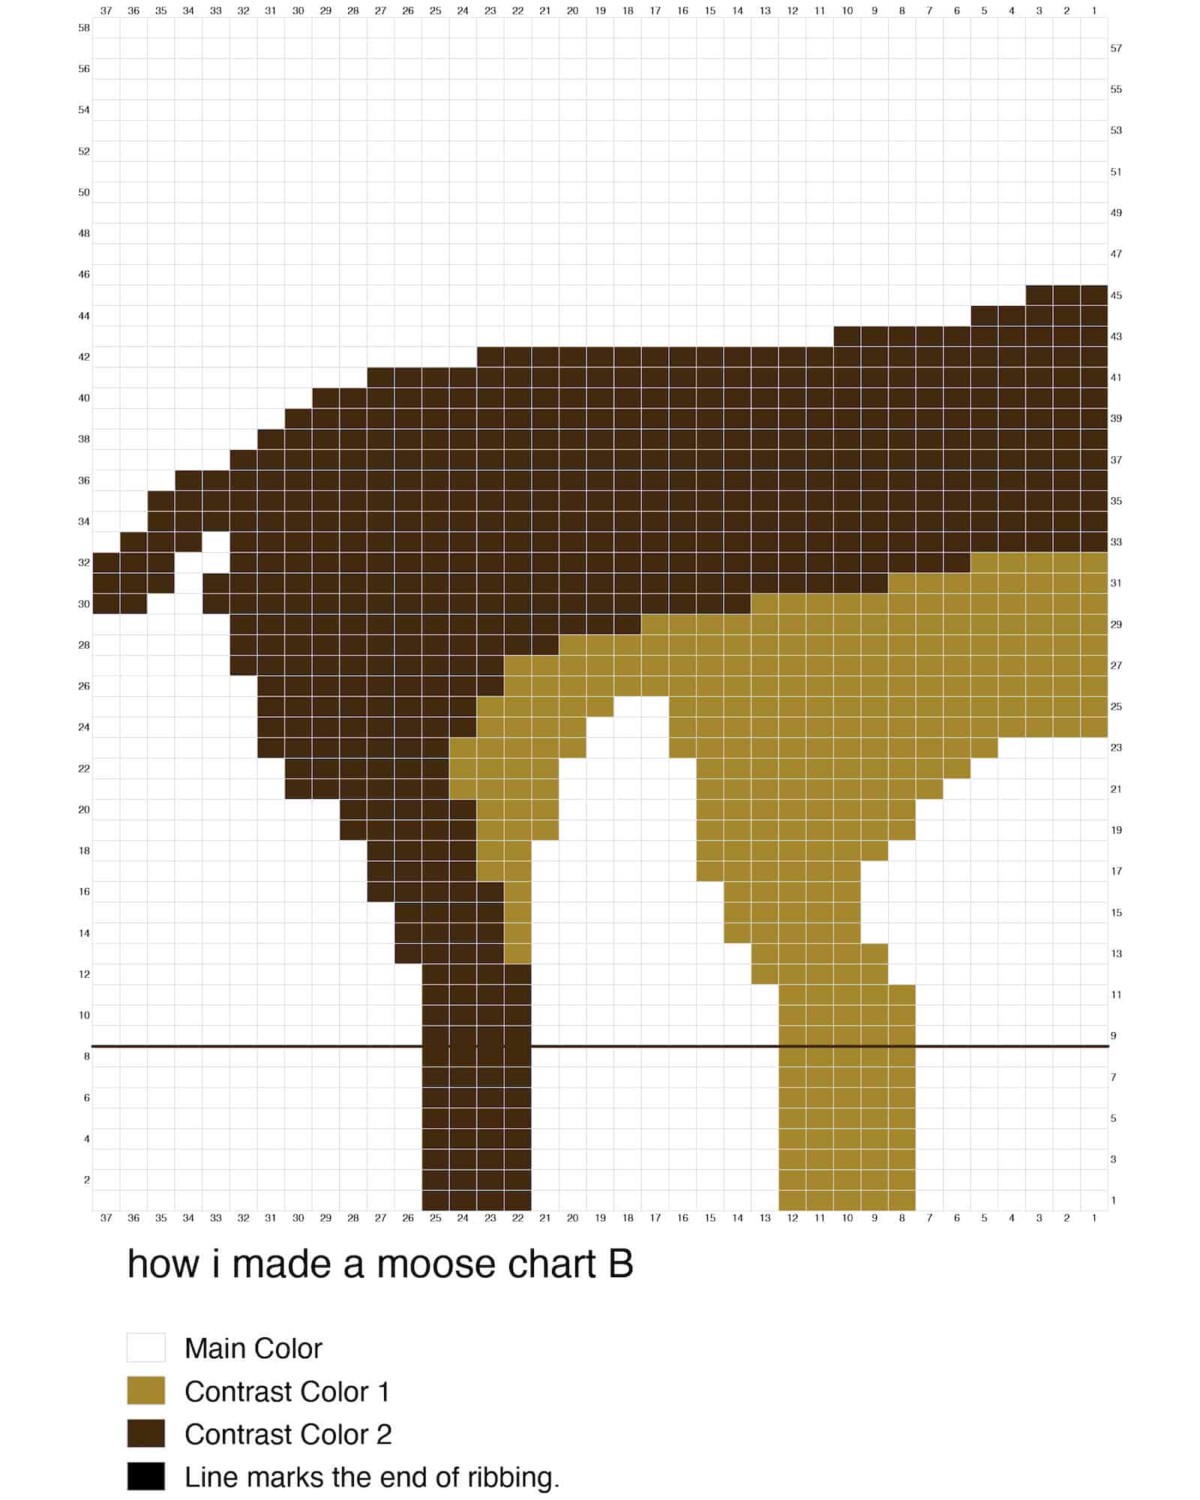
My suggestion: Use two little “bobbins” of your CC1 for the front cast on and two more, combined with one of your CC2, because you’ll need them for the beginning of the back, as you can see in my very crude first chart draft.
Find Your Measurements AKA Math
Don’t be like me and cast on willy-nilly, unless you like it that way. One cool thing about fiddling with yarn until you get what you want is that you find a way to make things work. That’s a very E.Z. thing to do, btw. Either way, you have to make some design decisions and measurements before casting on.
Since this is just a sweater recipe, it is very customizable. I’ll tell you how I found my desired sweater size, but chances are you already know your magic numbers for the coziest sweater.
A. Find Your Perfect Chest Size Using a Favorite Sweatshirt
You can always refer to a pattern you’ve knit in the past, to choose your sweater chest circumference. When making The Moose I measured a favorite sweater of mine and my husband’s. We both wear it – so I knew if I made this chest size, we could both wear The Moose.
I laid the sweater out and measured across the chest to get 52″. Then I compared it to my gauge swatch.
B. Find Your Gauge Per Inch To Get Cast On Numbers
You’ll need to knit a 4 x 4 in. gauge swatch to see how many stitches you’ll need to cast on. When you’ve finished your swatch, measure how many stitches and how many rows you knit in one square inch. Plug these stitches into your desired chest circumference and you’ll find your cast on st. amount:
Chest size in inches x by stitches per inch = total sweater stitches.
Total stitches / 2 = your cast on for both front and back pieces.
In my case: 53 inches x 2.5 stitches = 132.5. I rounded down to 132. So 132/2 = 66. So I cast on 66 stitches for both front and back. You can always just use my numbers if a 52-53″ sweater sounds good to you.
C. Choose your Sweater Length From Armhole to Hem
You can use another sweater to get an idea of your desired length from armhole to the bottom of the sweater. I made my chart small enough to be finished by the time I began armhole shaping because I didn’t want to have to think about intarsia and armhole shaping. This chart is 58 rows high, including the ribbing, so…
58 rows / your row gauge per inch = worked chart height measurement.
If this is less than your desired length from armhole to hem, find out how many more rows you’ll need to knit in Main Color before starting your armholes:
Your desired length from armhole to hem – worked chart height measurement = extra inches you need.
Find How Many Extra Rows You Need Between the Charts and the Armholes:
You can get your exact extra row count like this: Extra inches x your row gauge per in = exactly how many extra rows you need before arm shaping.
(My numbers: 58 rows/ 4 row gauge per in. = 14.5 in. My desired length was 18 inches. So 18in – 14.5in = 3.5 in. Now 3.5in x 4 row gauge per in. = 14 rows. So I added 14 rows of Main Color before I started my armholes.
D. Put All of Your Measurements In One Place
Since I ended up using most of Elizabeth’s raglan recipe percentages. I encourage you to get her book (It’s so popular most Half-Price Books have a copy.) and play with your numbers, too.
Here are all of my important numbers and measurements in one place. You can use them or further tweak your Moose by adding your own.
- Your desired chest circumference: 53 in.
- Front and back cast on sts: 66.
- Extra rows to add after chart, before armhole: 14.
- Sleeve cast on sts: 30
- Desired sleeve length (Mine was 20 in.)
- Total sleeve row count = desired length x row gauge per in. (Mine was 20 in x 4 rows = 80 rows.)
- My upper sleeve stitches before joining (33% of total body sts): 44.
- Held Underarm sts (8% of total body sts): 10.
- Rest of front sts worked in MC only = front cast on- 45 Chart sts: (Mine was 21 sts.)
- Rest of back sts worked in MC only = back cast on – 37 chart sts: ( Mine was 29 sts.)
E. Decide: Legs in Your Ribbing or Not
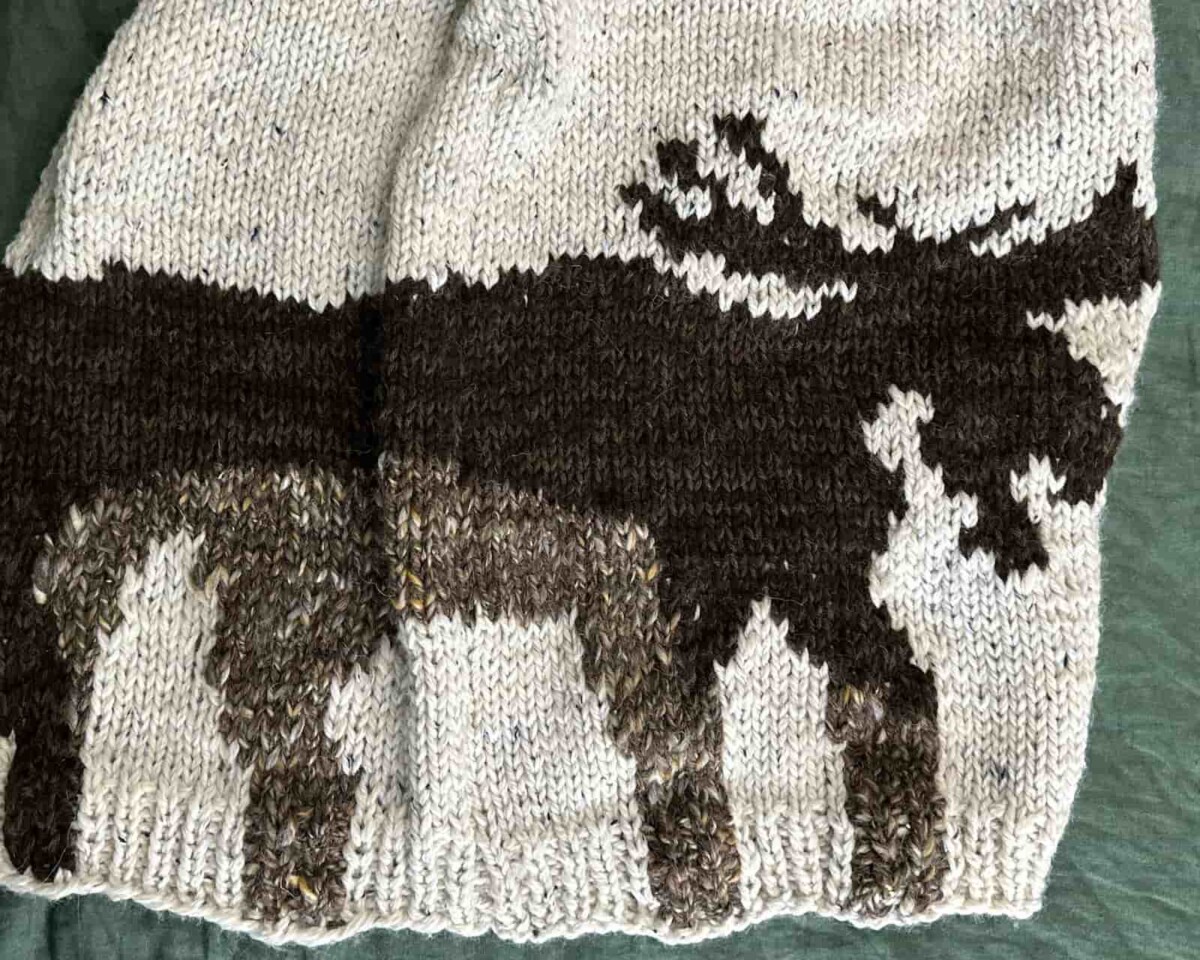
Do you want your moose’s legs awkwardly placed in the ribbing like the original? I did, so I worked my intarsia legs beginning with my first Right Side row. I have a line running across the chart to remind you where the ribbing would stop if choose to knit it like me.
This chart is small enough, however, that if you wanted to start your moose above the ribbing, you probably still can before you reach your armhole. In that case, ignore the black line in the chart.
You’re On Your Own with Intarsia
Sorry, if you have never worked intarsia and would like some guidance. I didn’t think to take video of my intarsia process. No one wants to watch that mess, but here is a good tutorial. Sometimes you just have to get into the thick of something and you’ll develop a feel for intuitively working intarsia and/ or carrying floats.
Ugly sweaters make great practice.
Work A Combo of Intarsia and Stranded Knitting for the Moose
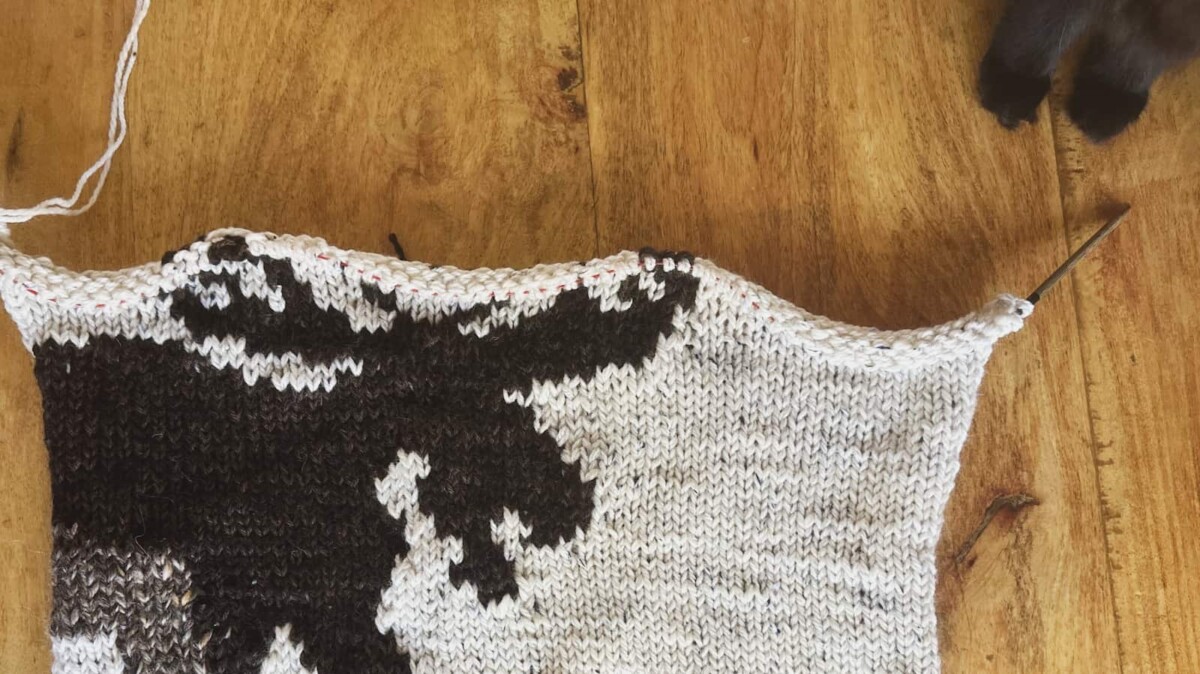
For the legs, I carried the MC across with floats because the bottoms of the legs are just a few stitches wide. So I used stranded knitting in some places and intarsia in others.
Meet me back here when you’ve reached your armholes! You might want to watch my video on my process while you work. There’s no intarsia footage, but it’s good chatty background noise.
My Abbreviations, Should You Not Know Them
- Sts: stitches
- MC: Main Color
- CC1: Contrast Color 1
- CC2: Contrast Color 2
- RS: Right side
- WS: Wrong side
- PM: Place a marker
- SM: Slip marker
- BOR: Beginning of round
- Dec: Decrease
- Inc: Increase
- K2Tog: Knit 2 sts together
- Skp: Slip 1 st. knitwise with yarn in back, knit 1, pass slipped st. over the knitted st.
- Rib: Ribbing, worked K1, P1, repeat to end.
- PU: Pick up
The Recipe for a Moose
This is the basics of how I worked this sweater. I use terms for measurements you already collected, but I also give my personal stitch counts. If you want more detail, my video on it gives a bit more info about my seaming and finishing.
I’ll have my charts at the bottom of this post but the downloadable link is here.
Front of Sweater
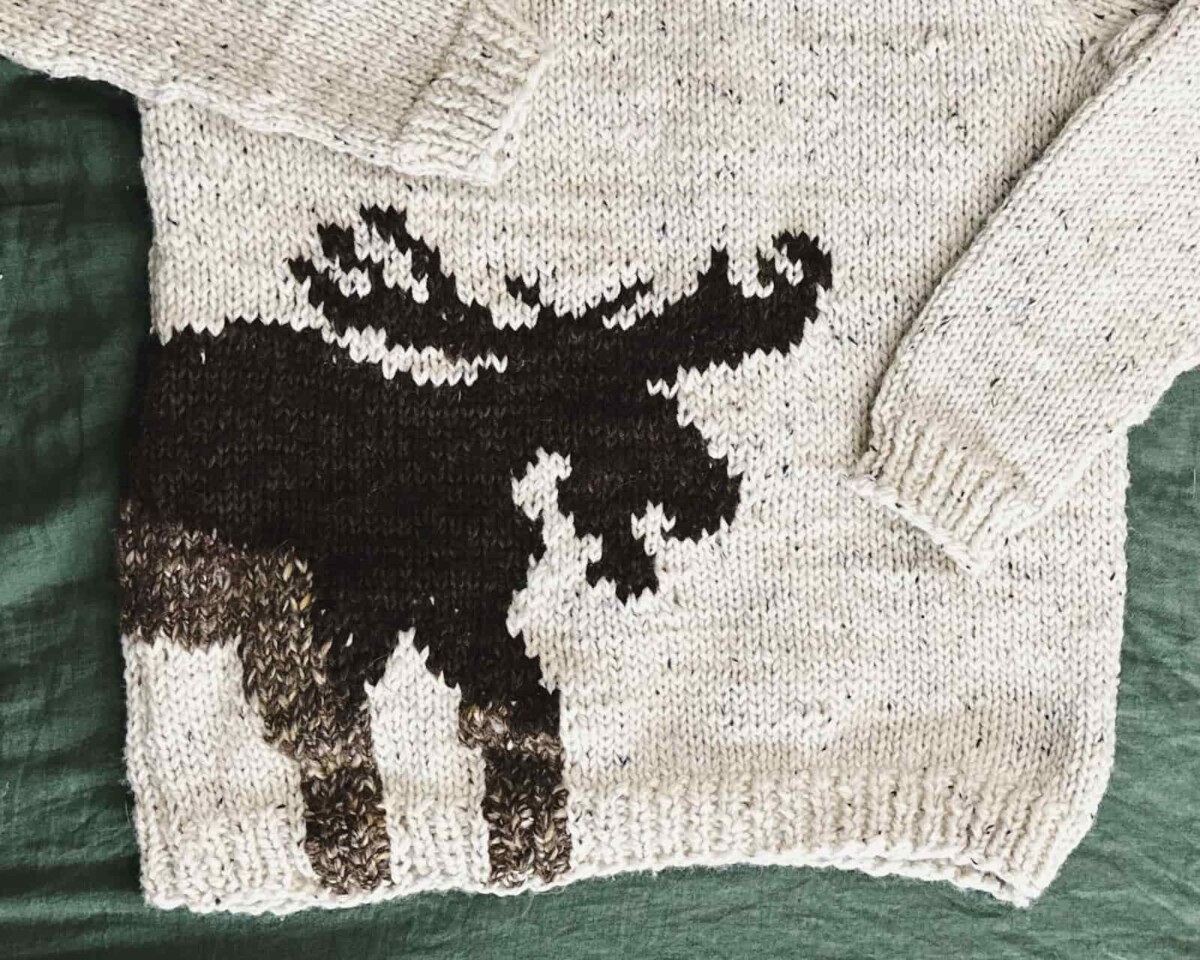
Remember, you will be working some stitches in MC before starting Chart At. These are the rest of front sts you found and put in your measurements list.
Using smaller needles, cast on front sts (66 sts for me).
Work Intarsia in Rib for 8 Rows:
Row 1 (RS): using MC, K rest of front MC sts. in rib, PM, work 45 Chart A sts. in rib to end.
Row 2 (WS ): Continue working Chart A for 45 sts in rib, SM, then work rest of front sts in MC to end.
Rows 3 – 8: Continue working chart and rest of front sts. in rib stitch.
Continue working front in stockinette in larger needles:
Rows 9 – 50(RS): Switch to larger needles. Work Chart A and rest of front sts. in stockinette. Continue using the marker to separate charted sts from rest of front sts knit only in MC.
Continue front in MC. Clip intarsia strands, leaving 6 in. to weave in.
Add extra rows you may want between the completed chart and the armhole here, ending with a WS row. (I knit 13 rows.)
Put upper armhole sts on hold:
Half your underarm stitch count. This new number is how many sts you will slide onto waste yarn at each side of your sweater front. Then put the rest of your front onto spare needles or another length of waste yarn. Set aside.
Work the Back
Remember you will be working some stitches after Chart B in MC only. These are your “rest of back sts” you put in your measurements list.
Using smaller needles, cast on back sts (66 sts for me).
Work intarsia in rib:
Row 1 (RS): Work 37 sts of Chart B in rib, PM, using MC work rest of back sts to end (I had 29 rest of sweater sts).
Row 2 (WS): Work extra MC sts in rib to marker, SM, Work Chart B in rib.
Rows 3 – 8: Continue working intarsia Chart B and rest of back sts in rib stitch.
Continue working back in stockinette using larger needles:
Row 9 – 50: Switch to larger needles. Work Chart B and rest of back sts in stockinette. Continue using the marker to separate charted sts from rest of back sts that are knit in MC.
Continue back in MC. Clip intarsia strands, leaving a 6 in. tail for weaving in.
Add extra rows you may want between the completed chart and the armhole here, ending with a WS row.
Put armhole sts on hold:
Half your underarm stitch count. This new number is how many sts you will slide onto waste yarn at each side of your sweater front. Then put the rest of your front onto spare needles or another length of waste yarn. Set aside.
Work Your Sleeves From the Cuff Up
Make two, duh.
Using smaller needles, cast on your desired cuff sts. Make sure increasing every 2 inches will give you the correct underarm st count. Multiply your desired sleeve length by your row gauge per in. to find how many rounds your sleeve will have. (For my husband’s arms: 20 in. x 4 = 80 rounds.)
Plot when your inc will begin and work them every 2 in. (I wanted 44 sts, but didn’t want a narrow cuff so I cast on 30 and worked 7 inc rounds.)
Begin Cuff in Rib Stitch
Rounds 1- 8: Work in rib st.
Switch to Stockinette
Switch to larger needles and work in stockinette to end:
Work 1.5″ plain in stockinette. (Unless you want to start inc sooner.)
Begin Increases
Begin Increases: Skp, k to 2 sts before marker, K2Tog. 2 sts inc.
Repeat inc round every 2 in. until you have reached your upper arm st count.
Continue until your sleeve is your desired length from cuff to underarm. Place underarm stitches onto waste yarn. (For me: I slipped 10 sts onto waste yarn.)
Join Sleeves and Body
Load your sweater parts onto the long circular like this: Slide live right sleeve stitches onto the needlle, PM, then add the back stitches, PM, add left sleeve sts, PM, and lastly slide the front sts onto the needle. PM for BOR. It’s a nifty puzzle.
Check to ensure you’re held underarm sts on the sleeve are lined up with the corresponding held underarm sts of both the front and back of each body piece so that you can seam them together later.
Knit Even for Your Desired Armhole Depth
Knit even for 1 in. or more. I knit for 1 inch and it’s perfect for me. It’s nots so great for my husband, though.
Begin Raglan Dec:
Round 1: Ssk, k to 2 sts before marker, K2Tog, SM. Rep 3 more times. 8 sts dec.
Round 2: Knit even
Repeat these two rounds until you are ready to shape the neck, ending with a dec round. (I had 6 regular sts between sleeve raglan sleeve dec sts.)
Set Up Neckline Shaping
Half the number of regular sts you have between raglan dec. This is the number of sts you will borrow from each side of your front to include in the neck shaping.
Place markers to separate the rest of the front from these sts to each side. (I had 6 regular sleeve sts, so I’ll mark off 3 to left of front and 3 to the right with markers.)
Begin Neckline Short Rows
Work one more round knitting even, but end at shaping marker between the front and right sleeve. Now place all of the front stw you won’t be shaping onto waste yarn or leave them alone on your circular, knitting only the neckline shaping stitches around the sides and back of the sweater.
Shape the neckline while continuing raglan shaping by knitting the shaping area flat. You will be knitting a dec round as RS then turning work and purling the WS even:
Continue raglan shaping:
Row 1 (RS): K to 2 sts to marker, K2Tog, SM, Ssk repeat 3 more times. K to end of neckline shaping sts.
Row 2 (WS): Turn sweater to WS and purl even all sts between your neckline shaping markers.
Repeat these two rows until all of your front sts have been worked, ending with a WS.
Join front and back neck:
RS row: K across all of your neckline shaping stitches, removing markers as you come to them. When you reach the selvedge at the gap between the front and back neck, PU 2 out of every 3 rows that are exposed at the edge. (I knit 6 short rows, so I picked up 4 sts.) Continue knitting across the held front sts. When you reach the other selvedge PU the same number of sts as before. PM for BOR.
Begin Neck Ribbing:
Using smaller needles, work 8 rounds of Rib. Bind off with stretchy bind-off. Seam the sides with mattress stitch and then Kitchener the underarm seams.
All the Finishing
I discuss my finishing and work on some of it in Episode 87. I’ll discuss it briefly here.
Seam the sides: I used mattress stitch in MC to seam the left side. For the right side, I used my CC2 to seam the segment that had the moose. Here’s a tutorial on mattress stitch.
When I got to the top of my seam, at the underarm, I left the two center sts where I’d joined the sides live. Though they looked a little recessed, I still had 10 sts for my bottom underarm seam.
Closing the Underarm Seam Without Gaps
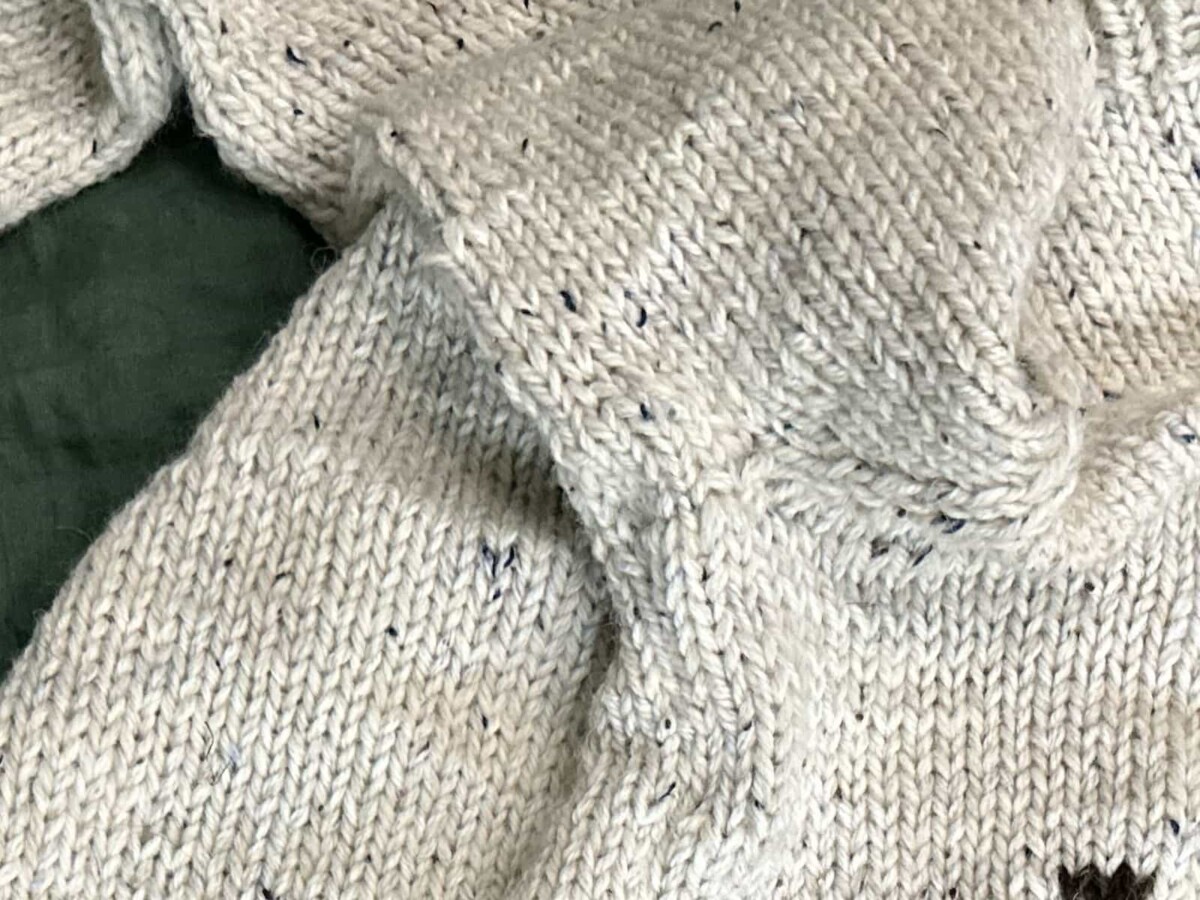
Before Kitchenering the seam, I wanted to try and close the little gaps at the top and bottom corners of the underarm. I should mention that even the great E.Z. says it’s impossible to explain how to close the gaps for each individual piece and knitter. She basically gives you leave to wing it. And that’s what I did.
Rather than knitting around, picking up extra sts, and then decreasing them, I tried closing the gap by twisting sts that are already worked, like this:
I loaded my top underarm sts onto the back needle and my bottom sts onto the front needle as if to Kitchener.
On the front needle: I picked up the worked st to the immediate right of my live sts, lifted it and twisted it with my hands. Then I slipped it onto the right end of my needle. I then found the worked st to the left of my live sts, lifted and twisted it, before sliding it on the left side of the needle.
For the back needle: Repeat the process for 12 sts on each needle.
Decrease These Extra Stitches As You Seam the Underarm
I worked my Kitchener like usual, except I treated these extra stitches on each side of the two needles as if they were one with the stitch next to them. You can see this in Episode 87, timestamp:
And here’s a good tutorial on Kitchener Stitch.
When they were all seamed with Kitchener St, I used the little yarn ends to weave into any areas that might still have gaps.
There may be better ways to do this. I’m sure there are. But I am very happy with my results!
Weaving Ends is Optional on an Ugly Sweater
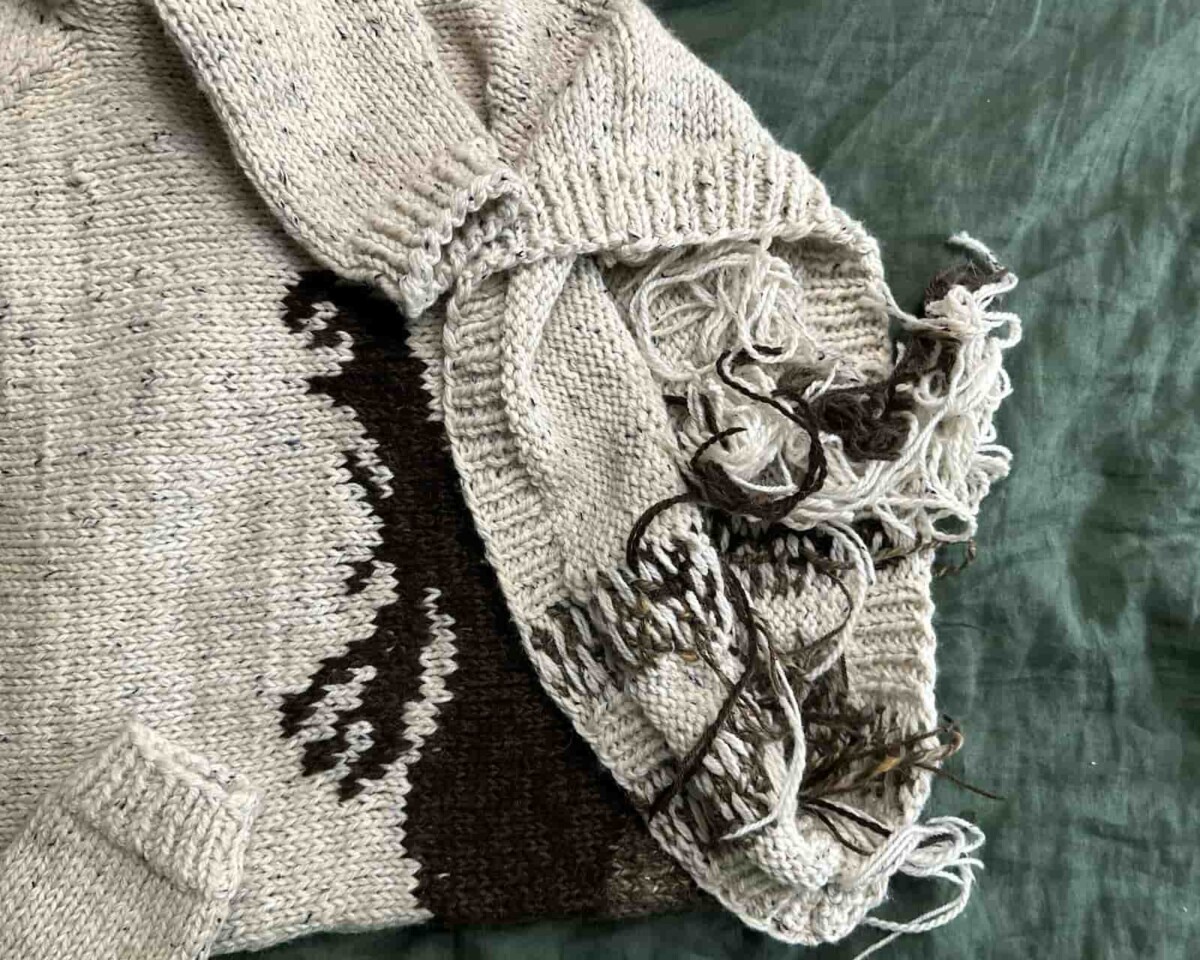
You can do what I did and just weave in the ends that show. I’ll get around to the rest, but it is a few days before Christmas and I want an ugly Christmas sweater to wear out.
My favorite way to handle colorwork ends on a not-too-precious-sweater? Run the end diagonally through a few rows of floats on the back side of your sweater, splitting the fibers of the floats with the yarn needle as you weave them. Loop your end over another float, then make another pass down through the same floats, splitting them with your end again.
This only works on wool- another reason to love a real wool sweater. 🙂
Behold, the Charts!
You can download them here but here’s a pic for posterity.
Pretty It Up!
Should you like the general idea of an intarsia moose wrapping around a sweater, but can’t quite adjust to this level of rusticity, there are things you can do to pretty this guy up.
- Use the same weight of yarn throughout the project for a smooth finish.
- Make CC1 a darker shade than CC2 for better perspective.
- Do consider holding strands together for the body of the moose. I think a little marling gives it depth and interest.
- Start the charts after you’ve finished the ribbing and work them entirely in stockinette.
- Consider shortening the body of your moose. This guy is long and a little misshapen.
- Add another contrasting color for the antlers.
- As I mentioned in Episode 87, you can duplicate stitch ornaments hanging from the antlers or a wreath/ crown in them to be more Christmas-specific.
Final Thoughts- Wow This Was So Hard
No, I don’t mean the knitting, the chart-making, or the percentages. I mean trying to put it into words without concrete numbers AND trying to make a chart online for the first time. And don’t get me started on the photoshopping of my video thumbnails. I swear it all makes recreating a famous knit seem completely easy.
Hope you enjoy this very long and detailed post. Remember when these sorts of things would be broken up like a daily diary of trial and error in the early 2000s? Ha! Now it is a repackaging of someone else’s ideas (E.Z.) that’s vlogged and written up, editing is outsourced, and AI generates a groovy image to sell it with. JK.
Still a pretty homespun blog post and most definitely a homespun vlog. Good grief that was a nightmare to edit. To the one person still reading, thanks! What will you consider recreating without a pattern?
